Quantcast
Channel: Windows Apps Archives - Beebom
Viewing all 203 articles
Browse latest View live

Quixey, Search Engine For Apps Across Different Platforms

$
0
0

If you are a kind of person who love searching for relevant apps on different operating systems or web platforms, then you might use Google or any other search engine. But the results are sometimes different from what you are looking for. Quixey is a search engine developed to search apps across different platforms along with ability to sort apps by categories like paid or free or all. You can get detailed information about the app and you can directly click the link to reach app store.

Quixey, Search Engine For Apps Across Different Platforms

At the home page you have option to search specific platform like mobile, browser, desktop or web-based apps. Users can look in sample searches to get an idea, how does the app works. You can select all to search the apps from all platforms.

quixey1

You can narrow down the search in each group by selecting the specific mobile platform, desktop platform, browser or web app category. Searching for apps is as easy as using Google search. Just search using the app name or type something like ” i want to play racing game”, it will show you appropriate search results.

search1

You can sort apps based on free, paid or all versions of app. Quixey will show app results with icons and ratings and platform that the app supports at the bottom with app developer.

search2

You can click any of the listed app to get a quick preview of the app with pictures and information. You can directly visit the app store by clicking the link for more information and user ratings.

search3

You can get more information right in your search results from Quixey, look at the pictures, visit the app store, sort the app by different platform or even share it with your friends on Twitter and Facebook .

Try Quixey today from here.

SEE ALSO:

Using Photo Sphere Feature of Android 4.2 Jelly Bean Using Photosphere Apps

Android Apps to Keep Track of your Running and Fitness

The post Quixey, Search Engine For Apps Across Different Platforms appeared first on Beebom


Best Windows Phone Apps In 2013 – Part 1

$
0
0

Windows phone apps

The Windows Phone platform is slowly but steadily growing, and while it might not be as big yet to contend the likes of Android, it is getting there. There have been a lot of new additions to the Windows Store this year, and most of them make good use of the great design ethos of the Windows Phone platform.

Here are some of the best Windows Phone apps out this year:

Nokia Pro Cam

This is among the best ever app released for Windows Phone 8 devices but is exclusive to Nokia Lumia 2012 and 2013 devices like the Lumia 1020. The Lumia 1020 is the best Windows device on the market as of now, and it comes pre-loaded with Nokia Pro Cam application which lets you preview the final image even before its clicked. It has a lot of options for pro users such as ISO, Exposure, Focus, Shutter Speed and Aperture. The Nokia Lumia 1020 price In India should be around Rs. 35,000 and most consumers cannot wait for it to become available in the country. While the Nokia Pro Cam app will be available for other devices shortly.

Netflix

Given that Netflix is the most popular subscription service for movies and TV shows, it’s not surprising that the Netflix app is one of the best for Windows Phone. The app recently received an update that fixes most of the existing bugs, so now it’s even better. With this app you can choose what to watch from thousands of selections. You can also rate TV shows and movies to receive relevant Netflix recommendations.

SEE ALSO : Top Social Apps for Windows 8

Skype

The Skype app has also been around forever, however, like Netflix, it also recently received an update to enhance video messaging. Skype allows you to make calls for free, given that you have a data plan or Wi-Fi. You can also IM, send files, share screens, and send video messages to friends who are offline.

Nook

The Nook app is great because it lets you select from over 3 million Nook eBooks, 1 million of which are free, and read the eBook s on your Windows Phone device. You can alter font, font size, and line spacing. One nice feature about this app is that if you are using it from multiple devices, the page that you leave off at is the page that you begin at again.

Kindle

Kindle also lets you have access to lots of eBooks, over 1 million. You can alter the background color of the book, number of text columns displayed, and font size. Kindle lets you pin your books to your Windows Start screen for easy access. Furthermore, Kindle also is compatible across devices. The page you end at on one device is the page you start at on another.

Bing Translator

Bing Translator is a really powerful translation app that can translate text and images with text. You can translate images with text by simply taking a picture with your camera. The translation is near instantaneous as long as the text in the image is printed and clear. Bing Translator also offers text to speech, which allows users to hear translations in a native speaker’s voice.

Adobe Photoshop Express

It’s convenient to be able to fix photos on your phone, rather than uploading them to your computer before sharing. This app allows you to do that and it’s easy to use. You can add filters, adjust the color, use several auto-fix features, or other basic features, like crop, rotate, and flip. There are add-on packs that you can get to get more functionality, such as the Adobe Noise Reduction Pack.

Bejeweled LIVE

If you’re looking for a fun, addictive Windows Phone game, look no further. This is a classic game where the objective is to match 3 gems. This fast-paced game has three different modes: Classic, Diamond, and a Butterfly mode, where the objective is to save butterflies from a spider. This is a game that would be fun for the whole family.

SEE ALSO : List of Windows 8 Keyboard Shortcuts

Hulu Plus

Hulu Plus is another great option for users looking to view TV shows and movies from their Windows Phone device. If you have a favorite show, you can pin it to your Windows Start screen so that you can access it easily.

This year brought about many solid, captivating apps for Windows Phone devices. Windows app development is only going to keep increasing as long as powerful Windows Phone devices keep coming out.

The post Best Windows Phone Apps In 2013 – Part 1 appeared first on Beebom

Top 15 Best Selfie Apps For Android, iOS And Windows Phone

$
0
0

When Selfies first started trending on social media, who would have thought they’d stay this long. It’s not just a thing gone viral anymore, it’s something that has potentially changed the way brands reached out to their audience on social media. If it weren’t that impactful, who would have come up with selfie-sticks?

Whether you are on Facebook, Twitter or Instagram, you will be welcomed with a barrage of selfies these days, so much is the craze. The selfie popularity has been well used by app developers, as they have churned out some great apps that make selfie snapping an even more fun experience. There are a lot of good selfie apps on all the platforms and the good thing is along with being a great selfie app, they are a great photo editing app too, which means you can snap a selfie and get to edit it on the go. Anyways, as always, here we are for you to help you find the perfect selfie app for your platform. So, here are our Top 15 Selfie Apps for Android, iOS and Windows Phone in 2015:

Top 5 Selfie Apps for Android

1. YouCam Perfect – Selfie Cam

YouCam Perfect

The YouCam Perfect Selfie app is a great app for all you selfie lovers out there. Along with great selfie taking features, the app also comes with great selfie editing tools to get you the perfect selfie you need. The app is feature packed and there are a number of interesting features like beautifying effects, face reshaper, object remover, stylization and ability to beautify all the features of your face.

Developer: CyberLink.com, Compatibility: Android 4.0 and up, Availability: (Free) Google Play Store

2. Bright Camera – Camera for Facebook

Bright Camera app is one of the popular apps for selfie taking. The Bright Camera app lets you take great selfies and make it even better, thanks to the great effects and frames. The app also lets you share your pictures instantly on all the social networks.

The feature list includes filters, selfie timer, beautification, tilt shift effects and more. The app also lets you add quotes and all, if that’s your thing. The app is free on the Play Store and you should definitely check it out.

Developer: Amazing Studio

Compatibility: Varies with device

Availability: (Free with in-app purchases) Google Play Store

3. Candy Camera

Candy Camera

Candy Camera app is one of the higher rated apps on the Google Play Store and it’s another great selfie app. The app lets you take selfies and see real time effects on them and there are more than hundred filters in the app.

There are a lot of editing features as well along with beautification, blemish removal, make-up features and more. The app is free with some in-app purchases, we sure you wouldn’t really need.

Developer: JP Brothers

Compatibility: Android 2.3.3 and up

Availability: (Free with in-app purchases) Google Play Store

4. Retrica

Retrica

Retrica is a full fledged app for selfie lovers and even for photo editing enthusiasts. The app even though not marketed as a selfie app is a great selfie app. The app has many fans due to its great interface and many features.

The great features from the Retrica app includes 100+ filters (along with real-time filters), collage maker, watermarking, timer and more. The app is a must check out if you want an all rounder photo editing and selfie taking app.

Developer: Venticake Inc.

Compatibility: Requires Android 2.3.3 and up

Availability: (Free) Google Play Store

5. Selfie Studio

Selfie Studio

The Selfie Studio app is aimed at all the selfie lovers out there and the app uses the front-facing camera, so if your device doesn’t have one, you won’t be able to use the app.

The app lets you brighten up your face with colours you can choose and there are other various features to better the experience like silent shoot, auto reverse, volume key shutter and more.

Developer: Vinghom

Compatibility: Android 2.3 and up

Selfie Camera App: (Free) Google Play Store

Top 5 Selfie Apps for iOS

1. CamMe

CamMe

CamMe is unarguably the most popular selfie taking app on iOS and rightly so. The app brings a lot of features, which should let you take that perfect selfie you are looking for.

There are a number of cool features like Photobooth, which like classic photobooth machines lets you take several pictures sequentially. There’s the Funshot feature, which lets enhances the pictures with cool cut-outs and and locations. The app is free for download and there are in-app purchases for more Funshot templates and Photobooth features.

Developer: PointGrab LTD

Compatibility: Requires iOS 7 or later

Availability: (Free with in-app purchases) Apple iTunes Store

2. Picr

Picr

Picr is a unique picture taking app, which has the ability to surprise you in a good way. The app asks you to take a picture everyday and creates a unique personal movie for you based on your pictures.

The Picr app on iOS lets you set reminders for taking pictures everyday or even every month. The app comes with unique features to get you the perfect selfie. The app lets you create videos with your pictures and lets add your own text and music to those videos. There are many more features and all these features are available for free on the App Store.

Developer: Marcus Rumbohm

Compatibility: Requires iOS 7.1 or later

Availability: (Free) Apple iTunes Store

3.  Frontback

Frontback

The Frontback app is a great app if you want to use your dual cameras. The app takes pictures front the front facing and the rear camera instantly, that way you can have your selfie and also tell the world the awesome place you are in.

The app also features some social features, as it lets you explore recent uploads based on popular, nearby and more. You can also follow friends or other people, who use Frontback. There’s a reaction feature as well, which lets you interact with others using a 5 second video.

Developer: CheckThis

Compatibility: Requires iOS 7.0 or later

Availability: (Free) Apple iTunes Store

4. Perfect 365

Perfect 365

If you want to perfect your selfies manually and you love tinkering with your pictures, Perfect 365 is the best app for you. The app has the headline “One Tap Makeover”, so it is a great app for people wanting to give their pictures a makeover.

The app packs in a number of features for make-up and touch-ups of your pictures. The app lets you remove blemishes, apply make-up, change your hairstyle, whiten your teeth, smooth-en your complexion and more. Yes, the app claims it will make you look like a model. The app is available for free on the Apple App Store and there are in-app purchases for various styles.

Developer: ArcSoft

Compatibility: iOS 6.0 or later

Availability: (Free with in-app purchases) Apple iTunes Store

5. oSnap

oSnap app

The oSnap app may not be a great photo editing app and it’s also not packed with a lot of features but it’s great at one thing, that’s taking selfies. If you want to take selfies on the go, the oSnap app should be a good bet.

The app lets you swipe from top to bottom to switch between the rear and front-facing cameras. The app also lets you take pictures by tapping anywhere on the display. The ease of use in taking selfies is what makes the app feature on the list.

Developer: Steve Young

Compatibility: iOS 6.0 and later

Availability: (Paid) Apple iTunes Store

 Top 5 Selfie Apps on Windows Phone

1. Lumia Selfie

Lumia Selfie

Anyone with a Lumia smartphone should be well aware of the Lumia Selfie app, which comes pre-loaded on Lumia Windows Phones. The app, previously known as Nokia Glam Me is one of the best apps for selfies.

The app lets you take selfies with ease and then edit it using the various features of the app. There are beautification features like eye enlargement and enhancing, whitening of teeth, softener, skin toner and more. The app also brings filters, sharing features and more. The app is available for free on the Windows Phone Store but it’s exclusive to Lumia devices.

Developer: Microsoft Mobile

Compatibility: Windows Phone 8 and 8.1

Availability: (Free) Windows Phone Store

2. Create A Perfect Selfie

Create A Perfect Selfie

The Create A Perfect Selfie app, as the name suggests is a great app if you want selfies taken from your Windows Phone to be perfect. You might not have heard of the app but you should definitely check it out. It’s one of the highest rated apps on the Windows Phone Store and even though it’s paid, it’s worth the small amount.

Create A Perfect Selfie brings a number of features like beautification of your photos, reshaping, defocus, red eye removal, filters, frames and more. The user experience is also up to the mark, so you’ll indeed get a great selfie experience.

Developer: Hde 7 Software

Compatibility: Windows Phone 8 and 8.1

Availability: (Paid) Windows Phone Store

3. PicMix

PicMix

PicMix is another great selfie and photo editing app that’s available on Microsoft’s platform. The app introduces itself as a mobile social photo sharing app. The app lets you take great selfies and brings some cool editing features.

The app lets you use fancy frames, add captions to your pictures, photo effects and more. PicMix also offers fun contests and social features, which make the experience of using the app fun.

Developer: Inovidea

Compatibility: Windows Phone 8 and 8.1

Availability: (Free with in-app purchases) Windows Phone Store

4. Headshot

Headshot

Headshot is a great selfie app, which makes sure you’re in the right place while taking a selfie with your rear camera. The app is the best solution if you want to take selfies with your high resolution rear snapper. The Lumias are famous for their cameras and the rear cameras are surely unmatched.

The app uses face detection to tell you which way to move yourself or the camera while taking a selfie with your rear camera. The app also has a multiple face mode, when there are more than one people in the viewfinder. The app also takes a picture automatically, when it finds you are in the right place.

Developer: Electric Squash Studios

Compatibility: Windows Phone 7.5, 8 and 8.1

Availability: (Free) Windows Phone Store

5. Intellicam

Intellicam

Intellicam, as the name suggests is quite an intelligent app, which makes use of speech and face recognition while taking selfies automatically. The app lets users take control of the camera through voice commands.

The app integrates with Windows Phone’s built in camera interface and lets you take multiple photos without touching your phone. The app should be great for people who want a hands free selfie taking experience.

Developer: Outcoder

Compatibility: Windows Phone 8 and 8.1

Availability: (Paid) Windows Phone Store

SEE ALSO: 10 Mobile And Web Apps to Identify Songs With Lyrics

So, all you selfie lovers out there, these are our favorite selfie apps for 2015 in the respective platforms. What are yours? Sound off in the comments section below.

The post Top 15 Best Selfie Apps For Android, iOS And Windows Phone appeared first on Beebom

10 Best Video Players For Windows

$
0
0

For those who are truly passionate about watching movies, a powerful video player is rather a must-have companion regardless their preferred genre of movies! And, of course, if you ask movie freaks, each of them will have a different preference — which actually puts you in confusion when it comes to choosing a good video player for a Windows PC. We take it for granted that the default Windows Media Player is not enough for you, and you need a better option.

If you are also in such confusion, you are at the right place, because we’ve made a list of top 10 video players you can choose for your Windows PC. So, shall we start our list of those 10 best media players for Windows? It is to be noted that we have considered several factors of each video player such as usability, distinctive features, etc while creating this list and we hope it helps the movie-freak in you.

1. VLC Media Player

We thought we would — and we should — start this list with a free, open-source software for watching movies, other kinds of videos etc, on your Windows PCs that may vary in terms of system configuration. It’s not actually one basic player alternative, but much more, especially when we take into consideration its streaming features and other ways of media input. VLC Media Player supports almost every video and audio format you come across and it is offering a wide range of subtitle format support as well — if you are passionate about subtitles too.

VLC Media Player has a truly simplified User Interface that does not include any ads, spyware or anything else that intrudes into user privacy. And, once you have installed VLC, there is no burden of installing extra codec files — popular ones come with it! Also, if its basic skin is boring, you can install extra skins, by downloading them right away from official site of VLC Player & the collection is being updated every day.

  • Price: Free

Download

2. KMPlayer

Here comes KMPlayer, my personal choice when it comes to watching films! Even when other video players become dumbstruck if the output is of a non-common format, KMPlayer would be able to play that file, quite smoothly & there are impressive features too. Some of those features of KMPlayer include its support for 3D, 2K, 4K & UHD, presence of internal codec files that make playback easier than you except, provided the PC may have relatively lower configuration.

Rather than merely playing files, you have an option to set up libraries when it comes to videos and music; thus, you can get an awesome media experience. Similarly, there is an option to play DVDs well, with all the features you could expect in a typical DVD player. One of the other features that we praise KMPlayer for, is the ability to adjust the playback screen with respect to our screen, convenience of use and there’s an in-built subtitle editor too.

  • Price: Free

Download

3. GOM Media Player

GOM Media Player comes from GOM Lab, and it is one of the best, free software you can have when you’d love to play almost every media file. It supports a wide range of video formats including MKV, FLV, etc along with standard media formats. Also, GOM Media Player has a number of advanced features when it comes to playback of files, such as the playback speed control, video effects, audio capture, A-B repeat screen etc. So, in short, GOM Media Player is an impressive software.

Talking of UI & Customization, GOM Media Player offers advanced-level customization that supports different skins! You can download skins from official GOM Player site and make GOM Player look like as you wish. Also, there is a codec finder that helps you find sufficient codecs online when there’s an uncommon file or if GOM Player lacks that codec. Despite all these, GOM Media Player will work fine with PC that runs Windows XP S2 or later.

  • Price: Free

Download

4. MPC-HC

MPC-HC, actually the acronym of Media Player Classic — Home Cinema, is yet another free software, when you prefer a lightweight desktop software to play different kinds of video files. With no sorts of intrusive toolbars or advertising stuff involved, MPC-HC offers a clean playback experience. It has to be noted that, regardless the lightweight nature, MPC-HC can play almost every heavy file that you will have in your Windows PC.

Additional features of Media Player Classic include key commands and lots more. While integrated codec support lets you play video files regardless how uncommon their video formats are, availability of the 64-bit version will be helpful when you need stabilized and powerful version. Talking about customization, MPC-HC can let you install toolbars and skins according to your tastes and preferences! In addition, MPC-HC has a portable version that extends its productivity to a new level. If we are to consider all these, MPC-HC is a great video player for Windows.

  • Price: Free

Download

5. Potplayer

Potplayer is yet another free video player for your Windows PC, and it has support for devices that are running XP or later and ranges up to Windows 8.1, which is a good thing we hope. It does not matter if you’ve a set of hardware that is low enough; Potplayer will utilize the Hardware Acceleration feature to make sure that you’re able to get an best media experience from your desktop. There are more features when it comes to playback as well.

For instance, unlike the aforementioned video player software, Potplayer supports different kinds of 3D Glasses and 3D-oriented features of Potplayer are just awesome from the user’s point of view. Also, there is an option to get 3D output as per what your requirement is. In addition, Potplayer offers support for almost every codec you would need in the whole journey of movie watching and it supports different kinds of subtitle files as well. Screen snapshot feature, the ability to choose between sound cards, scene bookmarking etc are worth noting too.

  • Price: Free

Download

6. DivX Player

When you do not want to compromise High-Quality movie-watching experience, including Ultra HD Videos and HEVC Playback, it is a good choice to go with DivX Player! DivX Player is actually meant for HQ Video playback and cross-device streaming of your media files. Don’t get confused about the name, DivX Player support popular video formats such as AVI, MKV & MP4 along with DIVX. The in-built Media Server feature in the bundle of DivX Player lets you stream media to various devices if they have DLNA support.

If we consider the case of playback, DivX Player has a lot of features such as FF/RW that helps you access chapters in each video, better organization through playlists, advanced audio playback, an in-built Recently Watched playlist for making sure that you can start from where you left off. In general, DivX Player is a great deal, indeed.

  • Price: Free

Download

7. RealPlayer

RealPlayer is a freemium video player solution that is available for Windows PC. Rather than merely letting you watch movies, there are enhanced options to share those videos through cloud. Then, you would be able to access those files from the device you want, anytime. Even though the free version offers standard features, it seems okay for us to get the premium version by spending $4.99 per month, given that you get a storage space of 365 GB. So, if you have good internet connection in all the devices, RealPlayer is worth a try.

There are additional features as well, such as the option to share your movies into big screen, such as HD TVs and you just need the app installed in your device. There is also an option to create bookmarks and keep them safe, so that you won’t miss a bit of your favorite stuff. Altogether, though a premium software, RealPlayer makes sense.

  • Price: Free; paid version available for $4.99

Download

8. UMPlayer

UMPlayer — short form for Universal Media Player — is a worth-checking software if you’d like to watch movies. It’s a free and open source solution, and it will remain so for ever; plus, you can trust the power of open source when you want a seamless movie-watching experience on your Windows PC. To make the stuff easier, UMPlayer has in-built codec support and that lets you play files including MP4, XVID, VOB, Matroska etc.

Plus, there are options to select media source from a wide variety of choices, including YouTube and other streaming services. When we consider all these, UMPlayer is a must-have software for the passionate movie freak in you, especially if you prefer a free media player with efficient features that make sense in the long run. And there are skins too — in case if you’d like to try new looks.

  • Price: Free

Download

9. Plex

Plex is another new-generation way of watching movies from not only your desktop but a wide range of devices.  It offers online space to store your favorite video files for later access. Even when Plex will act as a typical video player in your Windows PC, it has a number of awesome features hidden, which you may use according to what you want to do.

So, if you need a media player that CAN be extended to a media server, given that you are ready to pay, you may go with Plex. We think the software makes enough sense, from the user’s point of view. So, it’s a good choice, we bet and you can go with it, undoubtedly.

  • Price: Free; premium plans available

Download

10. SMPlayer

We come to the last member in the list of top video players for Windows — wait, it’s not a least-used one, by the way — and SMPlayer is worth the position. It is so because of the availability of features and simplicity of UI that has been kept throughout the interface. Along with standard features such as built-in codecs, SMPlayer offers a lot such as the YouTube support that lets you play videos right away from YouTube, collections of skins to choose from, integration to get the most appropriate subtitle etc.

In addition, SMPlayer uses MPlayer as the media playback engine and MPlayer is efficient enough to get the best out of your media hardware and thus to enhance the movie-watching experience. And, yes, it’s free and open source!

  • Price: Free

Download

SEE ALSO: 10 Best Malware Removal Tools For Windows

Well, that’s how we end our list of top 10 video players for Windows, but we think you might have a few suggestions for improving the list! We hope to know those suggestions through comments.

The post 10 Best Video Players For Windows appeared first on Beebom

7 Best Windows Media Center Alternatives

$
0
0

During the shift from Windows 7 to Windows 8, there were lots of things that changed – not only its design but lots of other things too! More prominently, in latest version, Microsoft removed some other elements, which did actually come built-in with Windows 7. Although it was good in some aspects, we lost an ultra-useful tool — Windows Media Center.

Windows Media Center, often called WMC, was a media hub for your PC, letting you watch movie & music files from various sources such as files and DVDs for example, record TV etc. All these tasks are interconnected in a way that you can access it in any other Windows-based device in your home network.

Quite sadly, Windows Media Center has been discontinued; you need to look for some alternatives be it Windows 8 or Windows 10. Likewise, if you are using Linux or Macintosh and want a Windows Media Center-like solution to use as a media hub, you too need to check out alternatives.

In this post, we’ve created a list of 7 best Windows Media Center alternatives that would definitely help you in the long run.

1. Kodi

20 Kodi Keyboard Shortcuts Every User Should Know

When you’re looking for a Home Theater software, Kodi should be the first option you’ve to go for! This Free & Open Source software was earlier known as XBMC and was popular since its launch. Kodi can let you do a lot of things such as playing local storage files, streaming web media content from services like YouTube, Spotify and Pandora Internet Radio etc. It also comes with PVR — recording TV Programmes using corresponding hardware which makes Kodi a superb and adequate alternative for Windows Media Center. Another factor that attracts users is that you can make use of Kodi for playing Python-based mini games.

Apart from media hub-based features, Kodi is quite customizable in terms of looks and productivity. Availability of its skins can help you make Kodi look like you wish, the large collection of Kodi add-ons and plugins make management of your media quite easier. For instance, you can stream content from other services by installing suitable add-ons & other stuff. It has to be noted that Kodi requires a PC with efficient graphics-based configuration to give you the best media experience. As of now, Kodi is available for Windows, Linux, Android, Macintosh and iOS as native applications that you can use quite safely. Altogether, Kodi is an awesome Windows Media Center alternative.

  • Price: Free

Website

2. Plex

Plex - Windows Media Center Alternatives

Simply put, Plex is a Media Center solution with some limitations — you can’t record TV or watch it live! In spite of these two limitations, Plex is an awesome software to keep your media organized while having support for a wide range of media formats. One of the prominent features of Plex is networking, which lets you access content in almost every device you have, regardless the platform. Plex also comes with sharing options, including a community for those media-lovers. Thus, Plex is a sense-making choice when your requirement is a Home Theatre PC which can be expanded to other devices of yours.

Simply put, Plex can be used as a typical media player in the front-end while the back-end works as a solution to get an easy-to-access collection of your media files. Also, when it comes to online media streaming, Plex offers a sort of integrated approach, with support for YouTube, Vimeo, CNN, TedTalks etc. Plex is available for Windows, Mac and Linux, along with streaming-oriented applications for Android, iOS, Windows Phone and Windows 8. Hence, if you’re looking for a Windows Media Center alternative with easier organization methods, Plex makes sense, we believe. It’s to be noted that Plex also comes with an impressive User Interface that is at the same time usable.

  • Price: Free, Premium Subscription available

Website

3. MediaPortal

MediaPortal

MediaPortal is yet another HTPC (Home Theatre PC) Media Center that can be a superb alternative to Windows Media Center. MediaPortal lets you do a lot of things such as watching and recording Live TV, playing normal kind of media files from storage as well as DVDs & Blu-rays, listening to music files as well as radio, stream media files to PCs or HTPC devices that re in your network. When these features are combined with the superb User Interface and the easy-to-access organization method of MediaPortal, the tool proves to be an adequate WMC alternative. Talking of the online streaming section, you can install corresponding plug-ins to stream content from popular services.

It has to be noted that MediaPortal is based on Kodi, despite the fact that you won’t judge so by looks! Eminent one among the features of MediaPortal is the ability to control the software using a multitude of methods like PC remote and Kinect. Nevertheless, MediaPortal is available to Windows only, though open-source and free! However, in your Windows PC, MediaPortal can do just magic, with all its user-friendly features. Altogether, MediaPortal is a typical & impressive WMC alternative, given that you need it just for your windows PC.

  • Price: Free

Website

4. Emby

emby

Emby is called the open media software and we will have to iterate the saying if we are to check out superb features, offered by the free Windows Media Center alternative. With native apps and supported-apps for popular platforms, Emby is a reliable solution when you need to store and organize your media as well as to access it from a multitude of devices. Emby was formerly known as Media Browser and it had limited features and capabilities back then. Now, after the update, Emby has received a lot of features like Cloud Sync and Folder Sync, features that enhance viewing experience, playback improvements etc.

Other features of Emby include availability of parental controls, feature to detect DLNA-based devices and a variety of dedicated apps that can let you take media anywhere. Availability of Emby can be classified into three — its Emby Server, TV Apps and Mobile apps. Emby server is available for Windows, Linux and Mac whereas the TV Apps offer a wide range of support including Android TV, Chromecast, Samsung Smart TV etc. Talking of mobile apps, you can find apps for Android, iOS and Windows Phone. In the end, we would say Emby is rather a sleek Windows Media Center alternative you can find.

  • Price: Free

Website

5.Universal Media Server

Universal Media Server

Universal Media Server is a great software to keep your media contents well-organized in a manner that you can have access to your movies, music or anything else from various devices such as TV! Thus, Universal Media Server will be a great alternative when the prominent intention of yours is to stream your media to different kinds of devices you have. UMS offers support for any DLNA-compatible device out there; on the other hand, if there is no DLNA support, you can use the web-based interface to move on.

Talking about extension of productivity, Universal Media Player offers a lot of plugins to choose from! For instance, it is possible for you to use an extension for external services such as Google Play Music. Also, there’s a plugin that lets you find information from IMDB when you are watching media content. Universal Media server supports plethora of devices such as xbox 360, PlayStation 3, Roku 3, etc.

  • Price: Free

Website

6. OpenELEC

Aeon Nox - Kodi Skin

OpenELEC is the popular short form for Open Embedded Linux Entertainment Center. It is an operating system that turns your computer into a fully-fledged Home Theatre (powered by Kodi). If you have a PC with lower configuration, you can install OpenELEC Operating System in it and just start organizing and watching your favorite media, like never before. In addition, if you have a Raspberry Pi or Apple TV, you can have separate builds of OpenELEC.

OpenELEC can do a lot of thing such as movie organization, TV show management, music player, picture browser and the ability to record TV programmes and other stuff. When combined with the large collection of add-ons, it’s really Christmas with OpenELEC. And, yes, OpenELEC is actually a more developer-oriented alternative, only for the people who have a PC to spare for media management — setting up OpenELEC is a task of 15 minutes, by the way.

  • Price: Free

Website

7. OSMC

OSMC

We are actually glad to make this list an Open-Source list and here comes the last member of list. OSMC believes in the minimalistic approach towards design and it’s just awesome to be with OSMC when you have TV Shows, Videos, Music and other kinds of media to play. Another thing that we loved about OSMC is the availability of an App Store that lets you customize OSMC as per your needs, by installing required plugins and all. Also, there is a wide range of support for media files, meaning that you would be able to play almost every kind of popular media formats you come across.

In addition, OSMC comes with a flagship device that can extend media experience to a new level — Vero, it’s called! OSMC is now available for Windows, Mac OS X and Linux; and it has support for Raspberry Pi, Apple TV and Vero. In short, we just loved OSMC — though last in list, it’s top in our favorite-list. And, what we loved most in OSMC is the minimal yet classy User Interface design that makes sense in the end. So, you need a clean alternative — just go for OSMC.

  • Price: Free

Website

SEE ALSO: 10 Best Video Players For Windows

Well, do you think any other Windows Media Center alternative deserves space in this list? If so, do let us know! We are waiting for your comments.

The post 7 Best Windows Media Center Alternatives appeared first on Beebom

10 Best Antivirus Software For Windows

$
0
0

In a world where most consider Privacy as a myth, it’s easy enough to say that Absolute Security is a myth too! As we find solutions to fix today’s issues, hacker / malware creator at the other side will have another one for tomorrow — simple as that. Thus, as a user who wants to keep her or his data intact and secure, it’s a necessity to use an antivirus software in your device; antivirus that can offer you up-to-date protection from ever-growing kind of security threats out there. Unlike the Mac scenario, where the code is far more secure and exclusive, Windows is vulnerable to threats and it is more or less rubbish if you don’t take precautions. In this article, we’ll have a list of top 10 antivirus software for Windows — shall we start?

1. AVG Internet Security

Avg

AVG has been offering antivirus software for a while, and its latest AVG Internet Security is a good-to-go deal when it comes to protection from both viruses and privacy threats. With a simple, less-resource-consuming UI on top, AVG is powerful enough to act as an antivirus tool, anti-malware, anti-rootkit and more. There are also some security-based features like Protective Cloud Technology and AVG LinkScanner Surf-Shield that protects you from accessing illegal or dangerous sites.

Apart from the Windows firewall, there will be an AVG Firewall for extra protection. When it comes to its Privacy protection section, features are going to really help you. For instance, File Shredder lets you delete files in an untraceable way whereas Data Safe can be used to store confidential and ultra-secret data. In addition, there is AVG Identity Protection and Wi-Fi Guard too.

So, if you need an antivirus software with additional privacy protection, you may go with AVG Internet Security! It’s a premium tool, which costs $54.99 for 1 year subscription.

Compatibility: Windows Vista, Windows XP, Windows 7, Windows 8, Windows 8.1

Visit Website

2.  BitDefender Total Security 2015

bitdefender-ts-2015

When you need a combination of antivirus protection and privacy protection, BitDefender Total Security 2015 is one superb tool to depend upon, especially if you prefer a seemingly-silent software. In addition to install-and-forget set up, BitDefender Total Security offers features, such as Smart Profiles — which does detect working environment and chooses appropriate settings — and one-click System Tune-up. It’s to be noted that BitDefender Total Security 2015 prioritizes privacy.

If we consider the case of your online world, there is Social Networking Protection and Fraud Warnings whereas the further privacy-oriented features of the software include BitDefender Wallet that helps you fill in payment credentials in an extremely secure manner, Parental Control that helps you keep boundaries, File Shredder for untraceable deletion of files, Personal Data Filter etc. Also, you get 2 GB of backup storage space.

Thus, when your preference is to have an install-and-forget antivirus software and privacy protector for your PC, you can go with BitDefender Total Security 2015, which is available for $89.95 per year.

Compatibility: Windows XP SP3, Windows Vista SP2, Windows 7 SP1, Windows 8, Windows 8.1;

Visit website

3. Avast Premier

avast - Best antivirus for Windows

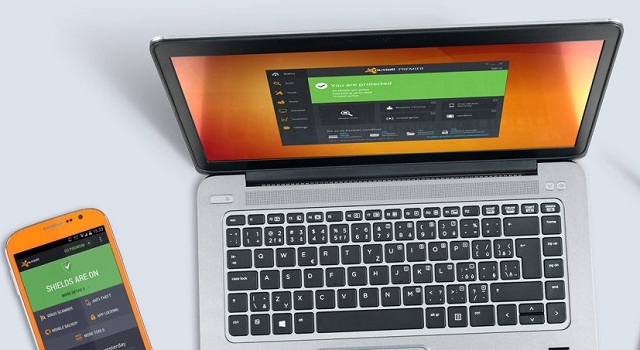
You’ll be familiar with Avast as one of the best free antivirus software out there, but Avast Premier is a nice choice when you need advanced protection at a reasonable price. Avast Premier offers features that might be useful for a common user as well as a security-conscious one. Even while keeping the lower resource consumption and relatively lower system requirements intact, Avast Premier brings professional-level security. Of course, Avast Premier has given importance to online world.

There is an extra firewall that keeps your information confidential when you have connected to a network. Also, you can use the SafeZone feature to process online transactions with enhanced security. Also, the networking-based features of Avast Premier — such as Home-network scanning, protection from DNS hijacking, top-level email support etc — are impressive. Also, there is an option to run an application in sandbox if you are not sure about authenticity of a particular app.

Altogether, for what you pay — $49.99 per year —, Avast Premier is indeed a superb antivirus software, with superb network-protection-oriented features.

Compatibility: Windows XP with SP2, Windows Vista, 7, 8, and 8.1 

Visit website

4. KasperSky Total Security Multi Device

kaspersky

Though often blamed for high resource consumption and system slowdown, KasperSky Total Security Multi Device is a nice antivirus software for Windows (and other platforms too). Once you have purchased this multi-device plan, it’ll be possible for you to avail protection in various devices such as Mac, Android. Apart from the stronger algorithms it uses, KasperSky is noted for finding vulnerabilities in various platforms — there’s a high-five on that. However, this security suite has given importance to online security and privacy.

For instance, while the Webcam Protection feature makes sure that your webcam is not being misused, its option to shred files will be useful when you need something to be deleted forever. In addition, when it comes to transactions, you can utilize the Safe Money technology and KasperSky says that the company is using exclusive methods. Also, it has Parental Control and Password Manager features to offer, which will be useful in the long run.

If you’re ready to cope up with slowdown, KasperSky is a good option. KasperSky Total Security Multi Device comes with a yearly plan of $79.95, which seems a bit expensive.

Compatibility: Windows XP with SP2 or higher, Windows Vista, 7, 8, and 8.1

Visit website

5. F-Secure Internet Security

F Secure

F-Secure Internet Security is a combination of standard antivirus & antimalware protection and protection from a lot of privacy threats in the online world. What makes F-Secure Internet Security exceptional is that all the features have been brought together in an easily accessible manner, with a lighter installation procedure. F-Secure has included a lot of basic features you would expect such as an intuitive interface that does not bother you when you’re gaming! In addition, it’s a kind of don’t-worry-be-safe scenario after installation.

F-Secure Internet Security is more than secure when it’s about protecting your online activities, let that be banking, parental control or whatever else of that kind! In case of banking, there is a section called Banking Protection that is actually meant to provide a secure environment for handling confidential information. Plus, F-Secure Internet Security has been proven to be impressive antivirus software in several tests, giving you another reason.

When you need a minimalistic antivirus software with standard features to fight off viruses and malware, don’t think much, go for F-Secure Internet Security. It costs $49.99 per year, for one-device package.

Comparability: Windows 8.1 and 8 (ARM based tablets are not supported), Windows 7, Windows Vista (Service Pack 2 or newer), Windows XP (32-bit, Service Pack 3 or newer)

Visit website

6. Panda Global Protection 2015

Panda

Panda Global Protection 2015 comes with multi-device support, features that can help you to not only get rid of files that are dangerous but also online threats. Apart from your Windows PC, Panda Global Protection 2015 can give the protection for Mac and Android devices as well. Along with standard features like antivirus, Rescue Kit, Firewall and Wi-Fi protection, there are features to protect the way you deal with the internet sphere of your life. Also, if we’re to compare other version of Panda Security products, there’s a lot more.

With Panda Global Protection 2015, you have online backup to keep your important files safe, file encryption that is helpful when it comes to ensuring no one is peeping etc. Also, its file shredder feature allows you get rid of files that need to be destroyed. In addition, Panda Global Protection 2015 is accompanied by TuneUp, a single-click option to boost speed and performance of your PC. It does not consume that much resources; nor does it slow down.

Panda Global Protection 2015 is available for $69.99! The rate is way too affordable, considering the vast collection of features it offers.

Compatibility: Windows 8/8.1 (32 & 64 bits), Windows 7 (32 & 64 bits), Windows Vista (32 & 64 bits),  Windows XP (32 bits) SP2 or later

Visit website

7. ESET Smart Security

eset

ESET Smart Security blends antivirus features and privacy protection features in a way that you’d find installation & other aspects of the tool quite easy. In terms of local PC use, ESET Smart Security can get you protected from various kinds of viruses and malwares whereas Portable Device Control makes sure that your data is safe in your hard drives. Also, the Gamer Mode works well for those who hate interruptions, even if it’s a worst-case scenario notification. If we are considering all these, accompanied by Cloud-powered Scanning, ESET Smart Security is powerful enough.

When coming to the online sphere, there are features like Parental Control, Anti-spam and Anti-phishing. Also, you’ll have another personal firewall that gives extra protection when you connect to un-trusted networks. Also, there is an Anti-theft feature, an option to track your device if it’s stolen. All the versions of ESET Security include US support and it’s very productive, we suppose.

Considering all these, for a yearly rate of $59.99, ESET Smart Security does its job well and it’s affordable too. And, it has been one of the popular choices.

Compatibility: Windows 8.1, 8, 7, Vista, XP, and Microsoft Windows Home Server 2003, 2011

Visit website

8. Microsoft Security Essentials

MSE

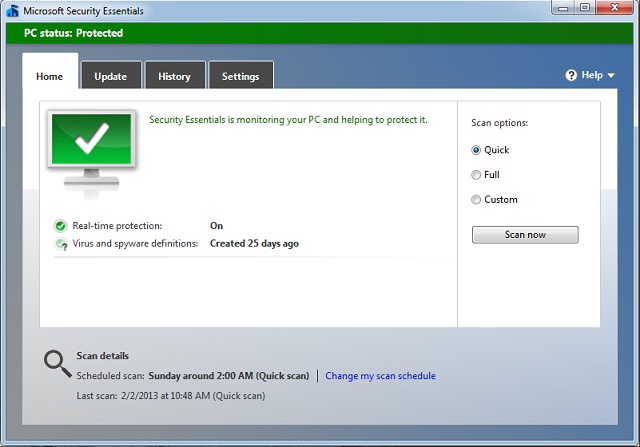
Microsoft Security Essentials, often known as MSE, is the official antivirus software from Microsoft Corporation! This tool was actually introduced as a standalone antivirus software back then, but was further integrated into Windows 8 PCs. Now, when you install Windows 8 or later versions in your system, you get all the features of MSE, under the label of Windows Defender. Thus, if you’re running Windows 7 or 8, you can go for Microsoft Security Essentials — as simple as that.

Microsoft Security Essentials is not a fully-fledged antivirus software you’re going to find. On the other hand, it offers protection from spyware, rootkits, viruses and other kinds of common issues. Also, there is an online system scanning and scanning, accompanied by Dynamic signature service. The only difference between Windows Defender and MSE is that the latter lacks what Microsoft calls enhanced protection.

Microsoft Security Essentials can be your choice when you need a free, yet sophisticated tool for your PC running on Windows 7 or Vista.

Visit website

9. McAfee Total Protection

McAfee

With the powerful labs to back, McAfee Total Protection can provide you protection from antivirus and other sorts of malicious files, web-based security threats etc. Antivirus section of McAfee Total Protection will give you top-level protection from Trojans, rootkits, viruses and other malware while McAfee Active Protection makes sure that even 0-day threats are not skipped.

On the other hand, when it comes to Parental Control section, you have been given the option to block sites / certain services, create time limits on internet usage, etc. Also, there is an option to have a log of internet activities. Plus, its Network Manager is useful when you want to secure your home network. Wi-Fi Protection enhances security when you connect to public networks whereas the PC optimization tools help in the unchanged performance of device. In terms of additional features, you have 256-bit encryption-based file locking and Social Networking protection. Plus, it comes with a simple-enough User Interface.

If you trust the security technology behind McAfee and needs a superb protection software for your Windows PC, just go with McAfee and you won’t regret, especially considering a good-to-go pricing of $79.99 per year, for a three-PC plan.

Compatibility: Windows Vista SP1 (32-bit and 64-bit), Windows 7 (32-bit and 64-bit), Windows 8 (32-bit and 64-bit), Windows 8.1 (32-bit and 64-bit) 

Visit website

10. Norton Security with Backup

norton

Norton Security with Backup is a fully-fledged, multi-device protection service from Norton, offering you protection from many aspects, such as online privacy, local PC threats and almost everything you’d come across. With a powerful set of real-time protection features, Norton Security with Backup makes sure that your files are as safer as they can ever be.

On the other hand, when coming to the online aspect, you can set limitations, as to let your kids have the best! Plus, as its name says, Norton Security with Backup gives you storage space of 25 GB, which can be used to store photos, documents or other important files in a secure manner. When you have come across something really important, it’s possible to upload it to the storage space and it will be sure, FOREVER. So, Norton Security with Backup is quite rich in terms of capabilities.

Despite all these richness, Norton Security with Backup has been priced quite affordable. You can have it for $59.99 per year, which is a good deal, we bet. After all, who won’t like getting some online storage space at a lower rate?

Compatibility: Windows XP (32-bit) with Service Pack 3 (SP 3) or later, Windows Vista (32-bit and 64-bit) with SP 1 or later, Windows 7 (32-bit and 64-bit) with SP 1 or later, Windows 8/8 Pro (32-bit and 64-bit), Windows 8.1/8.1 Pro (32-bit and 64-bit)

Visit website

SEE ALSO: Top 10 Malware Removal Tools For Windows

Are you using any of the aforementioned antivirus software for your Windows PC? If not, we’re eager to know about the tool.

Note: Windows 10 is launching on July 29, so we are hoping that these companies will launch Windows 10 compatible versions of these best Antivirus software. We’ll update the article when it happens.

The post 10 Best Antivirus Software For Windows appeared first on Beebom

10 Best Download Managers For Windows

$
0
0

We are quite rich in terms of web browsers! Nevertheless, it’s a bit surprising to know that even some quite popular web browsers cannot satisfy when it comes to managing downloads — be that Google Chrome or Mozilla. Often, you would have hated the lack of resume-download feature, and it’s exactly one of the reasons why you should utilize an effective download manager. There are other reasons as well, such as enhanced download speed, feature to manage multiple downloads without effecting browsing experience etc. In this post, we’ve listed top 10 download managers for Windows, which we hope will help almost every Pro internet user out there. We do hope you will be interested in trying out any of these at least for the sake of stable and improved download speed — who doesn’t like speed, after all?

1. Free Download Manager

Free_Download_Manager

Free Download Manager — often referred to as FDM — is a combination of easy-to-use interface and a powerful set of features. Furthermore, FDM is a superb alternative to Internet Download Manager, which is premium. Of course, there is a noticeable increase in download speed when you use Free Download Manager and the feature to pause & resume downloads anytime is a blessing for those who are from Chrome scenario. Apart from HTTP and FTP, FDM is offering support for torrent downloading as well, which too is quick when compared with other tools out there.

One of the other notable features of Free Download Manager is the ability to store different files in different folders, making the total file-management experience easier. Plus, FDM has an integrated media player that helps you view downloaded files without opening another tool. There is a Lite version of Free Download Manager available, and this version compromises features, as to work smooth on low-configuration PCs.

Altogether, Free Download Manager is simply a superb download manager for Windows, especially when you prefer an open-source, free one! We loved the no-ad UI as well.

Visit Website

2. Internet Download Manager

idm

Internet Download Manager has been popular as an impressive download manager software, which claims to bring a more or less increased speed and stability during downloads. Apart from integration with popular web browsers out there, IDM gives you drag-and-drop system and command line support when it comes to managing your downloads. There is a timer, which allows you to schedule your downloads. Of course, It has basic download management features such as the ability to keep different files in different categories and queue support etc.

In addition, when coming to the latest version of IDM, you can see support for Windows 10, ability to get video from web players, MMS protocol support etc along with a wide range of performance improvements. Also, if you have fair usage policy-based connections, the feature to set quotas will be quite useful. If you’re into the developer-based scenario, you will love the Site Spider and Grabber.

Thus, if you are ready to spend, Internet Download Manager will surely enhance the way you download files, let that be in terms of speed or stability. It costs $29.95!

Visit Website

3. Download Accelerator Plus

Download Accelerator Plus

Download Accelerator Plus is another free download manager, whose primary intention is to accelerate speed of the downloads. Making use of the dynamic download engine, DAP can give you the best download speed, as it also finds multiple sources to download a single file. There are also some stunning features in DAP and all these features have been brought using an ultra-simple User Interface that makes sense in the long run. Now, we’re speaking about free version of Download Accelerator Plus, but there’s a premium version with advanced capabilities.

Other noticeable features of Download Accelerator Plus include support for downloading videos from YouTube and a few popular video streaming sites, ability to convert YouTube files to MP3 and download them right away, its option to play video even before it’s finished, FTP Browser, in-built video converter etc. In the premium version of DAP, you get more features like File Shredder, ZIP Preview and Trace Cleaner.

Download Accelerator Plus is a blend of easy-to-use User Interface & powerful download engine. Obviously, the free version is enough, but you’ve the freedom to go further by paying $24.95.

Visit Website

4. JDownloader

Jdownloader

Yet another free, open-source software for download management, JDownloader brings standard features in a really convenient form. The software is written in Java and it helps you pause and resume downloads as you prefer, along with some impressive features such as multiple file download option, support for popular content sites like YouTube and Vimeo. Apart from Windows version, JDownloader is available for Mac, Linux and other developer-based things. In terms of comparison, we would say JDownloader is for those who download a lot.

For instance, JDownloader gets a new IP address when a particular service has blocked your IP from availing full level speed. Also, the availability of around 300 plugins will help you deal with various services like UCMS and WordPress. What makes this open-source software different is the availability of 24-hour support that helps you clear doubts & queries of yours. In terms of looks and UI, you have features like support for various themes and multiple languages. Despite all these features, JDownloader is a minimalistic solution for download managing.

When you prefer open-source and free to the premium ones, JDownloader is indeed a good-to-go solution, not only for Windows but also Mac and Linux.

Visit Website

5. DownThemAll

DownThemAll

DownThemAll is not actually a standalone download manager, but an extension for Mozilla Firefox browser, which is capable of bringing you advanced download management features inside the free browser. Obviously, you wouldn’t be able to compare DownThemAll with the fully-fledged download managers we mentioned above; it’s definitely an impressive solution when you need enhanced downloading speed and customization of downloads as per priority of yours. Yet there are some impressive features.

While the complete integration with Mozilla Firefox gives maximum results, the feature to spider pages will be quite useful in the long run. Going to another aspect, you have auto-renaming features as well. Altogether, DownThemAll is one of the best built-in download manager you are going to have — just within Mozilla, by the way. It’s as simple as that.

Visit Website

6. Orbit Downloader

Orbit_downloader_screenshot

Orbit Downloader is a fully-fledged download manager for Windows, giving you the options to download everything, at an enhanced level of speed and performance. Orbit Downloader calls itself the Download Manager Revolution, as it has integrated options for downloading from content providing sites like Pandora, YouTube etc. All these required features are accompanied by a simpler User Interface, which consumes relatively smaller amount of resources only. It also has some extensive features.

Orbit Downloader offers support for a variety of protocols such as HTTP, FTP, MMS, RTSP etc. Also, you have a feature to set up proxy server along with general options for general management. In addition, it offers RapidShare support, which lets you download files quickly from file-hosting sites. Of course, Orbit Downloader gives you superb level of support.

In short, Orbit Downloader is a minimalistic yet powerful tool for Windows PCs. It’s free, by the way.

Visit Website

7. FlashGet

flashget download manager

FlashGet has a lot of download management-based features to offer, all brought together using a simpler UI! Even as it makes use of least amount of resources, it can optimize downloads, giving you a speed that is impressive enough! At the same time, FlashGet offers support for various downloading protocols such as HTTP, FTP, BT and eMule.  All these features are combined with a set of features that let you manage files you have downloaded, such as the one to search, rename, drag-and-drop transfer.

Despite weighing incredibly low, FlashGet has superb features to offer, such as the support for skins that you can get and install. Also, there are some interesting add-ons available for FlashGet. For instance, It lets you get files downloaded in a remote PC through an email (given that FlashGet is installed in that PC).

Recalling all these features, FlashGet is indeed promising as a software to manage downloads in your Windows PC! It has some features that can do well in professional environments as well. After all, it’s free to use.

Visit Website

8. Download Ninja

ExtensionDownload Ninja

We already mentioned that Google Chrome is not at all sufficient when it comes to managing downloads! Download Ninja is an option that lets you extend Chrome to have some advanced capabilities when it comes to downloads. This tool is actually an extension of Download Ninja, which is a fully-fledged download manager for PCs. By installing this extension in your Chrome browser, you can add your downloads to Download Ninja in a click — simple as that. All its features are superb, we bet.

Apart from pausing and resuming downloads, there are features like Download Queuing, speed limiting, shredding files, support for multiple languages, availability of themes and ability to edit themes as per your taste and needs. If we are to consider all these, Download Ninja is indeed a great Chrome extension you have.

Visit Website

9. Internet Download Accelerator

Internet Download Accelerator

Accompanied by a lot of impressive features, Internet Download Accelerator is just an awesome software when it does come to the case of downloading files and managing them in an effective manner. Of course, the User Interface is so simple that you will love using it for download management; for instance, it has Active Visual Cart that lets you run the tool without actually opening it in a fully-fledged window. It is indeed an addition to the productivity, we believe. In addition, IDA has some impressive features when it comes to dealing with web-based content.

Although the design may look rudimentary, you should not underestimate abilities of IDA! It has a lot of features such as the ZIP Preview, option to watch videos even when download is halfway, FTP Explorer & a lot of others.

Of course, taking the availability of features and other capabilities into the account, IDA is a good-to-go option when you don’t mind the old-looking UI. Indeed, you can go with it.

Visit website

10. Microsoft Download Manager

Microsoft-Download-Manager

We end our list of top 10 download managers for Windows with a tool from Microsoft! Microsoft Download Manger is a simple-enough tool — which weighs less than 2 MB — to manage your downloads, whether they are broken and paused for the convenience of yours. The tool is now available for Windows 7,8,8.1 and 10, and it comes as an integrated solution for devices running later versions of Windows. You cannot expect that many features but you can manage your downloads smoothly — regardless the size of files you’ve to get.

Visit Website

SEE ALSO: 10 Best Antivirus Software For Windows

Are you using a dedicated download manager for your Windows PC — or depending upon the rudimentary option of your web browser? We are eager to know from you.

The post 10 Best Download Managers For Windows appeared first on Beebom

9 Windows 10 Settings You Should Tweak

$
0
0

Windows 10 has been out for nearly a week and it has already seen more than 14 million downloads within the first day of its launch which is definitely an impressive achievement. Already installed on so many PCs around the World, Windows 10 has become the hottest computer OS gaining an edge over its predecessor. Although, the new OS brings in a lot of new features that you have never experienced in a Windows OS before but fret not because we’re here to teach you everything that you should know about the latest iteration of Windows.

Below are the 9 Windows 10 settings that you should tweak before starting your journey on the new operating system.

1. Customize The Start Menu

start-menu

Windows 10 brings back the Start menu that was sacked with the release of Windows 8. The familiar old menu is now back and Windows users are loving it. The new Start menu looks amazing but old-school Windows users may find it a bit more overcrowded for their taste.

Microsoft has added live tiles similar to their Windows Phone and tablet mode into the Start menu.

If you are not a big fan of the tiles then you don’t have to keep them in your menu at all. You can easily get rid of them. Just open the Start menu, right click on any tile and select “Unpin from Start”. The tile will be removed from the menu. This way you can get rid of all the tiles and bring back the old look to your Start menu similar to Windows 7. Unpinning the tiles will not remove the corresponding app from your computer, if you want to completely remove the software then click Uninstall instead, this will instantly remove the application from your device.

2. Set-up The Way Updates are Delivered

Windows 10 automatically enables a feature that lets you download Windows updates from more than one source. This means that you can download updates from many PCs around the world in addition to Microsoft’s servers. This ultimately speeds up the download process and makes things easier for you, however, you also have to upload parts of updates for others to download. The uploading process works automatically though and you don’t have to do anything for it. If you’re really not interested in using your bandwidth to help other people get their update then you can easily turn this feature off.

updates-security

Head over to Settings > Update & security

advanced-options

Now in the Windows Update section, click Advanced options

how-updates-are-delivered

Now click Choose how updates are delivered

disable-updates-delivery

You can turn the feature completely off or just use it to deliver updates to the PCs on your local network instead of the whole internet.

If you have multiple computers in the house then choosing the “PCs on your local network” option will save you bandwidth by downloading the updates once and pushing them to all the computers on the local network.

3. Enable GodMode

GodMode

This is the perfect feature for power users of Windows OS. Anyone can try the GodMode just make sure that you are careful and don’t mess with the settings too much because this may lead to a corrupted operating system on your device. Activating the GodMode brings all different settings of your computer in one single place where you can tinker with each setting and perform different functions. The GodMode gives you complete control over your Windows PC and you can do anything you want.

To enable GodMode, just create a new folder anywhere you want and name it the following “GodMode.{ED7BA470-8E54-465E-825C-99712043E01C}” get rid of the quotation marks. When you create the folder, it will turn into a new file with a different icon. Open it and you will be inside the GodMode where everything is in your hands, so be careful because “Great power comes with great responsibility”  – Spiderman’s Dead Uncle Ben.

4. Free up Disk Space

If you are already in love with Windows 10 and don’t want to roll-back to your previous installation of Windows (7 or 8/8.1) then you can actually claim quite a bit of storage space by deleting the previous Windows installation. The previous installation files are only kept for a month, so if you choose to go back within a month you can do it easily, however, after a month or after getting rid of the files manually you can not roll back to the previous version. So make sure that you want to use Windows 10 and get rid of your previous installation.

free-up-disk-space

Open Start > All Apps > Windows Administrative Tools > Disk Cleanup

Now click the “Cleanup system files” button below. In the new pop-up select “Previous Windows Installation(s)” and “Temporary Windows Installation files” then hit OK. All these files will be completely removed from your computer saving you a lot of storage space.

5. Customize Notifications

customize-notifications

The new Action Centre in Windows 10 brings you all the notifications to your desktop similar to a mobile device. However, you may not be interested in getting notification for everything and every app in the Action Centre and luckily, you can actually customize it easily. Head over to Settings > System > Notifications & actions, here you can customize which apps display notifications in the Action Centre and turn off notifications for certain apps that you don’t want.

You can also choose your quick action icons that are displayed in the action centre for the ease of access.

6. Disable Quick Access View in File Explorer

disable-quick-access

Every Time you open the file explorer in Windows 10, you’re presented with “Quick Access” instead of “This PC”. In Quick Access, you can see the recently opened files and frequently used folders, however, veteran users prefer their file explorer to show them their storage drives instead of anything else. Here’s how you can make “This PC” the default location for your file explorer.

Open File Explorer > View > Options

In the new pop-up, click the scroll-down bar next to “Open File Explorer to” and choose “This PC” instead of Quick Access. You’re done and file explorer will now open to This PC every time.

7. Schedule Updates For Later

Windows 10 automatically downloads updates to your PC but you have the option to install these updates whenever you want. You can delay them for up to 6 days if you don’t feel like installing them. Head over to Settings > Update & Security > Windows Update

schedule-updates

Click Advanced Options, in the drop down menu select “Notify to Schedule restart” option. You will now be asked every time Windows downloads any new updates, you can then schedule these updates for any time you want.

8. Teach Cortana A Few Tricks

Cortana is one of the best personal assistants that was only available on Microsoft’s Windows Phone until Windows 10 came along. Now Cortana is accessible and integrated into the Windows 10 OS and you can easily use it to perform different tasks with just a simple voice command. Before you try using Cortana with you voice, you should set it up to recognize your voice easily.

enable-cortana

Open Cortana and click the Notebook icon then go to Settings. Now Enable “Hey Cortana” and click “Learn my voice”. Cortana will ask you to say a few phrases, after you’re done it will easily recognize your commands and carry out tasks for you without any hassle.

9. Utilize Multiple Desktops

multiple-desktops

Windows 10 brings in a new multiple desktop features that we have seen in Ubuntu and Mac OS X. This feature lets you use multiple desktops on one single PC. You can create different desktops for different tasks, one desktop for work, other for personal stuff, and so on. To create multiple desktops, press Windows key + Tab and then click New Desktop in the bottom-right corner. This will create a new desktop where you can start other tasks. You can switch between desktops by using the same button combination and then choosing the desktop that you want to use.

SEE ALSO: 11 Facts You should Know About Windows 10

If you have just downloaded Windows 10 then you should definitely tweak these settings first and utilize the new features. This will definitely enhance your Windows 10 experience. Let us know if you have any other tricks for the all new Windows 10 OS.

The post 9 Windows 10 Settings You Should Tweak appeared first on Beebom


19 Beginner Tips for Windows 10

$
0
0

Summary: Windows 10 has arrived with better features and improved interface. Most people are opting for the upgrade but may not know how to get the best out of it. That’s why, we list here 19 beginner tips for people who are new to Windows 10 and are looking for more excitement. Let’s check them out.

Windows 10 is new. Windows 10 is better. Than ever!

Windows 10 is the latest release from Microsoft that really rocks – especially when it’s compared to its predecessors. It has the potential to win over the most dedicated devotees of Windows’ old releases and even other operating systems like OS X and Linux. Windows 10 introduces numerous features, brings many good changes and fixes various problems that ranks it better than others and superior to its predecessors. The new product very well respects the legacy that Windows together with the traditional desktop has earned over the past years.

Windows 10 features an improved Metro UI, and brings back the Start menu that everyone missed in Windows 8. It also offers many new features like Cortana – the digital assistant, Microsoft Edge – the new and fast browser, Virtual Desktops, Notification Center, Windows Hello – support for biometric authentication, and the best of all – unified apps and unified store, i.e., apps and store that supports and runs on all the Windows 10 devices. It claims to offer the mix match of both Windows 7 and 8 in a new way that’s useful, improves productivity and looks stunning than ever!

The questions arise – how to use these new features? How the new features can be helpful? How to improve the Windows 10 experience? To answer these questions, we’ve compiled a list of 19 tips that helps the new Windows 10 users to get familiar and make the most of their upgrade, and use the new Windows to ease their life. Let’s have a look of what’s in the store.

Windows 10 Tips and Tricks for Beginners 

1. Switch on Cortana

Cortana is the Microsoft’s digital assistant for Windows, same as Siri is for iOS and Google Now is for Android. It can listen to your voice commands and perform the actions required to help you. But by default, Cortana voice listening capabilities are switched off in Windows 10.

You can switch on its abilities using these steps: Click the Search bar in taskbar > select the Notebook icon > select Settings, and then enable the “Let Cortana respond when you say ‘Hey Cortana’” option. Your computer needs to have a working microphone to support the voice listening feature, of course.

Switch-on-Cortana

2. Start using Windows 10 Virtual Desktops

Microsoft has finally brought out-of-the-box support for virtual desktops, which was available in Linux and OS X for very long time. Virtual desktops feature allows you to better manage the opened applications and windows by clubbing them in groups.

Any one of the virtual desktop (or the app group) can be active at a time, and thus offers an uncluttered Tasks View. To get started with virtual desktops, open the Tasks View by clicking on its icon on the taskbar (present at immediate right of the Search bar) or hold down Win + Tab keys.

Start-using-Virtual-Desktops

3. Customize the Sync Settings

Windows 10 has improved over the sync feature debuted in Windows 8. It allows you to sync your settings and files over the other devices you sign in using the same Microsoft account. You can customize your sync settings from Start menu > Settings > Accounts > Sync your settings. There are seven different sync modes to choose from – the first option switches off all the syncs, and the other options are the individual sync settings used to enable or disable a particular type of sync.

Customize the Sync Settings

4. Learn new Windows 10 Keyboard Shortcuts

You can become more productive if you learn the shortcuts to perform various regular tasks such as using virtual desktops, snapping apps and more. Below are the shortcuts to help you do things faster.

  • Win + Tab (open Tasks View)
  • Win + Left + Up (move app to top-left quadrant)
  • Win + Left + Down (move app to bottom-left quadrant)
  • Win + Right + Up (move app to top-right quadrant)
  • Win + Right + Down (move app to bottom-right quadrant)
  • Win + Ctrl + Left or Right (change virtual desktops)
  • Win + Ctrl + D (new virtual desktop)
  • Win + Ctrl + C (speak to Cortana)
  • Win + S (view weather, news, sports, help, etc.)
  • Win + Ctrl + F4 (close virtual desktop)
  • Win + Up and Down (snap apps to top or bottom of screen or maximize them)

5. Get Familiar with the new Command Prompt

Command Prompt in the new Windows comes with the ever-demanding feature. It has become more accessible than ever by supporting the standard copy and paste options. From now on, you can easily copy and paste the text content in the command prompt (cmd.exe) using the Ctrl + C and Ctrl + V key combinations respectively. Moreover, it packs lots of customizations under the Properties option.

Get Familiar with the new Command Prompt

6. Improve Battery Life in Windows 10

Windows 10’s battery saver feature can help you if your laptop’s battery is running low. It is smart enough to throttle the background processes and threads to limit the power usage and save power to allow your machine to last longer. It is better than power-saving modes found in previous Windows releases and can be enabled using this procedure: click Start menu > Settings > System > Battery saver.

Improve Battery Life

7. Change Windows 10 Default Browser or Programs

Windows 10 allows you to change the default browser or other programs to suit your choices of software. To change the default browser or programs, head on to Start menu > Settings > System > Default Apps. In the right pane, click Browser or other handler/protocol you want to change the default program for and choose your choice of program from the dropdown list.

Change the Default Browser or Programs

8. Sideload non-Store Apps in Windows 10

Windows 10 supports sideloading of apps, which allows you to download and install applications outside of Microsoft Store. There are lots of apps that are not available on the Store and those can be installed using this trick. Sideloading of apps is only allowed for developers, and thus you need to enable developer mode before installing non-Store apps.

To enable the developer mode, open Start menu > Settings > Update & Security > For developers, and select Developer mode. After you’ve become developer for your system, enable sideloading of applications by going through the steps: launch Start menu > Settings > Update & Security > For developers, and select Sideload Apps. That’s all, you can now download and sideload apps.

Sideload non-Store Apps

9. Turn off Windows 10 Notification and System Sounds

Notification and system sounds are used to alert the user whenever an important action is performed. In order to turn off the system sounds in Windows 10, you need to do the following steps: right click the Speakers icon on the taskbar > Sounds, and choose No Sounds under Sound Scheme and press OK button. To disable all the notification sounds for all the apps, open the Start menu > Settings > System > Notifications, and toggle off Show app notifications. Please note that it will also turn off all the notifications and not only the sounds for the notifications.

Turn off Notification and System Sounds

10. Change Screen Resolution

Screen resolution of the system needs to be correct in order to allow Windows 10 to facilitate better display of the content and the clarity of images on the screen. To change the screen resolution of your system, right click on the Desktop and select Display Settings > Advanced Display Settings. Choose one option from the Screen Resolution dropdown and click Apply to set the resolution.

Change Screen Resolution

11. Move or Install Apps to Another Drive

Windows 10 Apps are the Metro Apps that were introduced in Windows 8. They are by default installed in the C (System) partition, but if you want to make space by moving them to another drive, here is what you need to do: go to Start menu > Settings > System > App & Features, and click on the app you want to move, select Move, select a drive and click Move to move the app.

Moving apps one by one can be painful if you’ve lots of installed applications. You will find changing the default install location much easier and convenient than moving apps. To change the default location for installation of Windows 10 apps, open Start menu > Settings > System > Storage. Click on Save locations, select any drive for New apps will save to. This feature may not be available in some editions but possibly be offered soon through an update.

Move or Install Apps to Another Drive

12. Apply Dark Theme as Night Mode

Windows 10 can be customized to be friendly for low light conditions by applying a dark theme. Here’s how to enable the dark theme: Press Win + R to open the Run dialog, type in regedit.exe and hit Enter. Navigate to “HKEY_LOCAL_MACHINE\SOFTWARE\Microsoft\Windows\CurrentVersion\Themes” and right click Themes and select New > Key. Name the new key as Personalize, and then click on Personalize. In the right pane, right click the mouse and select New > DWORD value and name it as AppsUseLightTheme, and confirm that its value is 0.

Apply Dark Theme as Night Mode

13. Record Screen using Xbox app (Built-in Screen Recorder in Windows 10)

Windows 10 supports native screen recording via the Xbox app. To record the screen, open the Xbox app, click Win + G to open the Game bar, and select Start Recording from the options.

Record Screen using Xbox app

14. Change Windows 10 Taskbar Search Provider to Google

Windows 10 uses Bing as its default search provider, which you won’t possibly like as a Google fan. You can set your favorite search engine as the taskbar search provider by going through these steps: install Google Chrome on your system, open Chrome browser and install Bing2Google extension. Now, change your default browser of Windows 10 to Google Chrome by going to Start menu > Settings > System > Default Apps > Browser, and selecting Chrome. Now you can make searches through Google directly from the taskbar’s Search box.

Change Taskbar Search Provider to Google

15. Enable Windows 10 Start Screen

Windows 10 boots directly to the desktop unlike Windows 8 that used to boot to the Start screen. You can enable the same in Windows 10 by enabling the tablet mode. To enable the tablet mode, click on Notifications icon on the taskbar and click on the Tablet mode. Now you can press the Win key whenever you want to launch the Start screen.

Enable-Start-Screen

16. Use Snap Assist

Windows 10 has better snapping capabilities and tries to assist you while you snap apps using the mouse. When you try to snap an app and some part of the screen is still empty, Snap Assist feature shows up with a thumbnail list of open windows. You can choose any one app/window from the list to snap it to the left or right of the screen along with your previously snapped app’s window.

Use-Snap-Assist

17. Use Windows 10 Hello

Windows Hello is a system-level biometric authentication system. It’s claimed to be much safer technology than traditional passwords, and provide you instant access to your Windows devices. However, your device needs to have support for fingerprint or camera for this feature. You can head to Start menu > Settings > Accounts > Sign-in options, find the entry for Windows Hello and options to setup either a face or fingerprint, and after setup, you can use yourself to login to your Windows 10.

Use-Windows-Hello

18. Customize Windows 10 Start Menu

Windows 10’s Start menu is a melding of two worlds – the Start menu from Windows 7 and the Start screen of Windows 8. It’s beautiful and user-friendly than ever, and comes with a bunch of all new customization options. To pin an app, right click it on Start menu and select Pin to Start. To unpin a tile, right click it and choose Unpin from Start. Right clicking a tile gives more options like resize, etc. To create a group of tiles, drag a tile to empty space in Start menu until a horizontal or vertical bar appears, and then you can drag more apps there to create a group.

Customize Start Menu

19. Solve Low Bandwidth Problem in Windows 10

Microsoft has announced a new update delivery method in Windows 10 that proves to optimize and speed up the download speeds for updates. But there’s a catch – your computer may be used to deliver quick updates to other computers on your local network as well as the Internet. This may slow down your Internet as reported by many users, but this can be solved by tweaking a setting. Here’s how to switch off the new update delivery feature: open Start menu > Settings > Update & Security > Windows Update > Advanced options, and select Choose how updates are delivered and toggle off Delivery Optimization option, and your computer will be out of this optimization scheme.

Solve Low Bandwidth Problem

SEE ALSO: 9 Windows 10 Settings You Should Tweak

Which of the above mentioned Windows 10 tips helped you most? Do you know any other tip or trick for the all new Windows 10? We’d love to hear from you through the comments section.

The post 19 Beginner Tips for Windows 10 appeared first on Beebom

How To Create a Bootable USB For Windows 7, 8 or 10

$
0
0

If you have lost your Windows installation disc or the manufacturer of your PC didn’t provide the disc (most don’t provide now), then you still do have an alternative. You can just create a bootable Windows USB drive to install Windows 7, 8 or 10 by plugging in that USB drive. It is actually quite easy and free to do, all you need is a USB drive, Windows ISO image and a dedicated software.

However, the process and tools are actually different for the installation of each version of Windows. The source to get the Windows ISO file is different and the tool required to create a bootable USB drive is also different (or at least the process is). So it is important to know which tools you require and how to create a bootable Windows USB drive for your particular Windows version (7,8 or 10).

In this tutorial, we are going to show you how to get Windows 7, 8 and 10 ISO image (Legal and Free) and create a bootable USB drive out of it to install Windows in any PC (if supported).

Create a Bootable Windows 7 USB Drive

Windows 7 is Microsoft’s most used Windows right now, so its quite obvious that many people still want to know how to create a bootable USB drive of it. Although, Windows 7 is the most used Windows version right now, but Microsoft’s focus is still on Windows 8 and 10 as the represent the future of Windows. So Microsoft doesn’t offer any easy to download or bootable USB creation tool for it.

However, it will still let you download the ISO file separately, but only if you already own Windows 7 product key, not for testing purposes. So getting Windows 7 ISO is not a problem if you are already a owner and just want the ISO for future installations. Otherwise, you will have to install Windows 7 using a DVD disc, which you can borrow from your friend if they have one.

There is no official (legal) way except these two to get a Windows 7 ISO image. You can download the Windows 7 ISO from Microsoft’s software download site by providing a valid product key.

Microsoft also offers a separate tool to create a bootable Windows 7 USB drive, which you can download from CodePlex.

Using Windows USB Download Tool

bootable-Windows-USB-Drive (1)

Now, that you have both Windows 7 ISO and Windows USB Download Tool, it is time to create a bootable Windows 7 USb drive. The tool we are using doesn’t offers much customization options or extremely fast processing, but it is very easy to use. Anyone can easily use this tool and create a bootable Windows 7 USB drive. If you are a bit tech savvy and want some more control, we have also reviewed a tool below that offers everything.

Attach the USB drive to your PC and make sure it has at least 4 GB storage space on it. There should also be no important data on the USB as any other data on the USB will be deleted in the process. Now, just launch the Windows USB Download Tool and in the interface, click on “Browse”. Here, select the Windows 7 ISO that you downloaded and click on “Open”.

Now, all you need to do is go to the next page and select the USB drive you attached. After that, just start the process and you will have bootable Windows 7 USB drive when the process ends.

Use Rufus to Create a Bootable Windows 7 USB Drive

Rufus is another great tool for creating a bootable USB, but it is a bit complex, perfect for advanced users who need more control. For using this tool, the requirements are same. You will need a Windows 7 ISO file and a USB drive with at least 4 GB space and no important data on it.

Download Rufus and launch it. Don’t get confused by all the options, they will auto-fill according to the provided files and USB drive. Make sure the USB is attached and click on the “Drive” icon under “Format Options” heading. Now select the Windows 7 ISO file and click on “Open”.

bootable-Windows-USB-Drive (2)

If both USB drive is attached and ISO file is provided, all the options should automatically fill according to the requirement.

bootable-Windows-USB-Drive (3)

No need to touch anything unless you know what you are doing. However, you may like to change “File System” to “FAT32” if your PC as UEFI bios. Now, make sure last three options are checked under the heading “Format Options” and click on “Start”. After that, confirm the prompt and the process will start. It will take few minutes to complete the process, but it will be faster than the above tool.

bootable-Windows-USB-Drive (4)

bootable-Windows-USB-Drive (5)

2. Create a Bootable Windows 8 and Windows 10 USB drive

Windows 8 and Windows 10 are supported by Microsoft, so they offer media creation tool for both of the Windows. This tool can download both the Windows and also create a bootable USB drive in the same process. You will not have to provide any product key and can use these Windows for testing purposes.

The process is exactly same for both Windows 8 and Windows 10, only difference is the media creation tool download link. So we are only going to review the process for downloading and creating a bootable Windows 10 USB drive, you can follow the same steps for Windows 8.

If you already have an ISO image of Windows 10 or 8 from any other source, then just use the tools mentioned for Windows 7 to create a bootable Windows USB drive. Otherwise, just follow the steps below.

Creating Windows 10 bootable USB Drive

Download Windows 10 media creation tool from Microsoft’s official website and launch the program. Now, select the option “Create installation media for another PC” on the first page and click on “Next”.

bootable-Windows-USB-Drive (6)

On the next page, you need to select Language for the Windows, Edition of the Windows and architecture (select 32-bit or 64-bit depending on your PC type) and click on “Next”.

bootable-Windows-USB-Drive (7)

Select “USB flash drive” on this page and click on “Next” again. On the next page, confirm the USB drive you have attached by clicking on “Next” and the process will start. It is a 3 GB file so it will take some time to download and create a bootable Windows 10 USB drive. Once the process finishes, you can just use the USB to install Windows 10.

bootable-Windows-USB-Drive (8)

bootable-Windows-USB-Drive (9)

For Windows 8, you can download the media creation tool from Microsoft’s website and follow the steps above to create a bootable Windows 8 USB drive.

SEE ALSO: 9 Windows 10 Settings You Should Tweak

If you have any questions or would like to add any further information, let us know in the comments below.

The post How To Create a Bootable USB For Windows 7, 8 or 10 appeared first on Beebom

6 Best Uninstaller Software for Windows

$
0
0

In our day to day computer usage, we install a lot of programs on our PCs, and get rid of them when they are no longer required. Probably this is the reason that installing and uninstalling programs is one of the most commonly performed activities on a computer.

Now, uninstalling a software application (via Control Panel) is an exceedingly simple task, and almost everyone knows how to do it. However, more often than not, this default method leaves behind junk temporary files, broken registry entries, and unnecessary stuff like that. And that’s not exactly a good thing.

But thanks to some really great uninstaller software available, you can easily ensure that doesn’t happen. Sounds like something you can use? Let’s dive in, and find out more about the 6 best uninstaller software for Windows.

Best Uninstaller Software for Windows

1. Revo Uninstaller Pro

revo uninstaller pro

Arguably one of the most popular uninstaller software, Revo Uninstaller Pro includes a whole bagload of useful features.

Revo Uninstaller Pro automatically detects all the installed programs. It includes multiple uninstallation options, such as Quick Uninstall (removal with no user intervention and automatic deletion of leftover files), and Forced Uninstall (useful for removing remnants of already uninstalled programs). All you have to do is select the program(s) you want to uninstall, click on one of the uninstallation options, and Revo Uninstaller Pro will take care of the rest.

But that’s not all. Apart from the core uninstaller module, Revo Uninstaller Pro also includes useful tools such as Autorun manager (to configure auto-run programs), Browsers cleaner (to delete browsing history), Backup manager, and a lot more features like that. It’s even available as a portable application. So if you’re looking for a powerhouse tool that can not only free your computer of unwanted programs, but also remove general junk files, go for Revo Uninstaller Pro.

Platform Availability: Windows 10, 8, 7, Vista and XP (Desktop).

Price: Paid version licenses start from $39.62, 30 days trial available. In addition, a free version with reduced functionality can also be downloaded here.

Download

2. IObit Uninstaller

iobit uninstaller

Feature laden programs don’t always have to cost a fortune, and IObit Uninstaller is solid proof of this, delivering a whole lot of features for free.

IObit uninstaller lists all the detected programs installed on your PC, although you can also filter the list to view only applications that recently installed, or used infrequently, and things like that. Just like Revo Uninstaller Pro, there are multiple uninstall options available, such as Batch Uninstall and Force Uninstall (for those especially pesky programs).

Powerful uninstall functionality is IObit Uninstaller’s speciality, but it’s not the only thing it’s good at. In fact, it can also detect and uninstall all the browser toolbars and plug-ins that (can) slow down your browsing experience. Other than that, IObit Uninstaller also lets you manage startup programs, clean up invalid files, shortcuts etc., and even shred files so that they can’t be recovered. Bottom line is, if you’re on the hunt for an all rounded uninstaller program that also includes some good PC management features, and most importantly, is gratis, things can’t really get any better than IObit Uninstaller.

Note: By default, IObit Uninstaller’s setup program is enabled to auto-download and install IObit’s system optimization application called Advanced SystemCare. However, you can easily uncheck this option during installation.

Platform Availability: Windows 10, 8, 7, Vista, and XP (Desktop).

Price: Free

Download

3. Ashampoo Uninstaller

ashampoo uninstaller

Using Ashampoo Uninstaller for the first time can be a little intimidating, but once you know your way around it, things get a lot easier.

As an extremely capable uninstaller software, Ashampoo Uninstaller has just about every feature you’d expect from an application like it. You can uninstall programs using multiple methods (e.g. silent uninstall, uninstall with auto purging of left over files). However, surprisingly Ashampoo Uninstaller doesn’t support batch uninstallations, which is why it’s placed at third on this list.

But don’t worry. Ashampoo Uninstaller has a whole truckload of PC optimization features that more than make up for that. Simply go to the Tools sub-module, and you can find additional sub-utilities that can be used to do everything from defragmenting disks and optimizing registry, to managing startup programs and deleting duplicate files. What’s more, you can even adjust group policies, shred files, and do lots of other stuff. All in all, Ashampoo Uninstaller is more like a complete PC optimizer program with robust uninstallation prowess, but that also makes it a bit more complicated than competing applications like Revo Uninstaller Pro and IObit Uninstaller.

Platform Availability: Windows 10, 8, 7, Vista, and XP (Desktop).

Price: $49.99, 10 days free trial available, extendable to 30 days with a free trial license.

Download

4. CCleaner

ccleaner

Even though CCleaner isn’t strictly an uninstaller software, it’s still a part of this list because it’s just too good. And although there are paid versions of it available, the free version is just as feature loaded.

Probably the most well known system cleaning and optimizing application out there, it packs in a lot of goodies in a really lightweight package. At its core, CCleaner basically deals with removing all kinds of unwanted files, broken registry entries, missing shortcuts etc. from the computer, thus making it faster and bloat-free. However, CCleaner also includes some handy additional tools that make it even more awesome.

And one of those tools is the Uninstall sub-module, which, as the name suggests, lets you not just quickly remove installed applications, but also delete false traces of already deleted files. In addition, CCleaner’s other sub-modules let you find and delete duplicate files, securely delete files, manage startup programs, and do a lot more. So if you’re looking for a pretty rounded uninstaller software that is also more of a PC optimization suite, but don’t want to spend the money that the previously mentioned Ashampoo Uninstaller demands, CCleaner is going to serve you just perfect.

Platform Availability: Windows 10, 8, 7, Vista, and XP; Mac OS X 10.5 and later.

Price: Free, Pro versions start at $24.95.

Download

5. Absolute Uninstaller

absolute uninstaller

Nearly all the uninstaller software discussed so far pack in a handful of extras as well, in addition to the core uninstallation features. And while that’s not a bad thing, there might be users who want something simpler?

If you’re among the lot, Absolute Uninstaller is for you. A simple yet robust uninstaller software, Absolute Uninstaller doesn’t try to do too much, but what it does, it does really well. There are no extra PC optimization tools, no fancy add-ons, or anything like that. Just really great program uninstallation goodness.

Absolute Uninstaller displays all your installed software applications as a list, though you can change this view. The listing can be filtered to show only recently installed programs, large programs, and the like. All you have to do is select the program you want to get rid of, and hit the Uninstall This Program button. Multiple programs can be removed as well, using the Batch Uninstall option. Can’t get any easier than that, right?

Note: Absolute Uninstaller’s setup program is auto configured to download and install Glary Utilities, a system optimizing program from the same vendor as itself, at the last step of installation. However, you can easily un-check this option at the end of the installation.

Platform Availability: Windows 10, 8, 7, Vista, and XP (Desktop).

Price: Free.

Download

6. Geek Uninstaller

geek uninstaller

Looking for the absolute easiest and straightforward way of uninstalling one or more of the software programs installed on your Windows PC? Geek Uninstaller is what all you geeks (and non-geeks) need.

Having a ridiculously basic single-window UI, Geek Uninstaller makes removing installed programs a cakewalk. And since it’s a lightweight portable app, you don’t even have to install it. Simply run Geek Uninstaller, and it’ll show you a listing of all the installed programs. Now, select the programs you want to uninstall, and either hit Enter key, or choose Uninstall from the right click context menu. There’s also a Force Removal option that can be triggered from the Action menu, for those extra hard to remove programs. Other than that, you can export the list of programs as an HTML file, and directly search for them on Google via the context menu. That’s a really nifty addition if you ask me!

Platform Availability: Windows 10, 8, 7, Vista, and XP (Desktop).

Price: Free

Download

SEE ALSO: 21 Tips To Speedup Your PC

All pumped up to remove those unwanted programs?

The above discussed programs not only do an incredible job of removing unwanted software from your computer, but also pack in some really nice extras. If you want powerful uninstallation features with multiple uninstall options, go for Revo Uninstaller Pro, or IObit Uninstaller. If you wouldn’t mind a bit toned down uninstallation functionality but prefer overall system optimization features more, try Ashampoo Uninstaller or CCleaner. And if all you require are basic uninstallation capabilities, Absolute Uninstaller and Geek Uninstaller are going to work just fine. Try them all out, and see which one(s) you find the best. Know any similar uninstaller software that could’ve made it to the list above? Do mention them in the comments below.

The post 6 Best Uninstaller Software for Windows appeared first on Beebom

How To Run Windows 10 From USB

$
0
0

We all have our computers set up according to our individual requirements. This includes things like system settings, default save locations for files, set of installed programs/applications, and even custom themes. That said, nearly all Linux distributions let you carry your personalized digital work environment on a USB flash drive. What if you could do the same with Windows 10, and have it run on any computer, directly from a USB flash drive?

Turns out, you can, thanks to the Windows To Go functionality. But before we take a look at how to run Windows 10 from USB, here is a rundown of the hardware and software needed for the same.

Initial requirements before proceeding:

Before you can start off with creating a portable Windows 10 installation on a USB flash drive, it’s important that a few, basic requirements (both hardware and software), as listed below, are met:

  • A USB 3.0 flash drive of at least 16 GB (preferably higher) capacity.
  • Windows 10 ISO file (or installation disc).
  • WinToUSB, a freeware (more on this in the next section) utility installed on the computer.

How to Install Windows 10 on USB Flash Drive using WinToUSB?

For creating a portable copy of Windows 10 on the USB flash drive, we’ll be using free version of the WinToUSB utility. It has numerous advantages, such as the ability to create Windows To Go flash drives from non-supported versions of Windows. Not only that, it can also clone your existing Windows installation as a digital work-space on the USB flash drive (useful when you don’t have an ISO/installation disc).

That out of the way, here’s how to use WinToUSB to install Windows 10 on a USB flash drive:

Step 1: Install and run WinToUSB, specify the location of the Windows 10 ISO (or installation disc), and click Next.

wintousbstep1

Step 2: Select the USB flash drive (provided it’s already plugged-in), after which the program will format the drive. In the next step, select the flash drive as both system and boot partition (no need to tinker with the other options), and hit Next to start copying Windows 10 to the USB flash drive.

wintousbstep2

Step 3: Wait as Windows 10 is installed to the USB drive. Needless to say, this can take a couple of minutes. Once the process is finished, you can use this flash drive to boot (and run) a portable, fully functional copy of Windows 10 on any computer, complete with all the pre-installed modern apps and programs. Great, isn’t it?

Important points to be noted

  • When you boot up Windows 10 off the USB flash drive for the first time, there’s a bit of setting up that you have to do. This includes things like setting up the account information (e.g. username, password), and in general going through the Out-of-box experience (OOBE), that you’d do in case of a regular Windows 10 installation (See the screenshot below). However, once configured, all these settings are saved on the USB flash drive, and you won’t need to configure them again.

win10portablestarting

  • Generally, whenever you use the portable Windows 10 installation on a new computer, the OS automatically looks for the best default drivers for the connected hardware (e.g. Monitor). So it might take a few minutes (and reboots) before you can start working on the computer.

Possible Issues

Due to the technicalities involved in running an Operating System as big as Windows 10 from a USB drive, there are some issues that you might come across. A few of these are listed below:

  • Reduced performance: Even though USB flash drives are getting better, they still aren’t as capable of handling the OS as well as internal disk drives. So it’s not unexpected for the general performance to get a little choppy at times, especially when Windows 10 is installed on slower USB 2.0 flash drives, and also during CPU intensive tasks.
  • Driver problems: Although the portable Windows 10 can automatically search for the best drivers for almost any computer it’s used with, there might be times when one or more drivers aren’t found. Consequently, not all hardware (e.g. Audio, Wireless) might work on the target computer.
  • Local disk partitions not detected: As per the default Windows To Go configuration, when a computer is booted with a portable copy of Windows 10 from a USB flash drive, the disk drives on the host computer are not accessible.

SEE ALSO: How to create a bootable USB for Windows 7, 8, or 10

Carry Windows 10 with you everywhere

It’s not possible to have the comfort of working with your own, personalized Windows 10 work-space every time. However, the ability to run Windows 10 completely from USB drives gets you pretty close to that. And even though the whole thing is not without its issues, it works pretty well for what it is. Take it for a spin to see how it works out for you, and let us know your thoughts in the comments below.

The post How To Run Windows 10 From USB appeared first on Beebom

Quixey, Search Engine For Apps Across Different Platforms

$
0
0

If you are a kind of person who love searching for relevant apps on different operating systems or web platforms, then you might use Google or any other search engine. But the results are sometimes different from what you are looking for. Quixey is a search engine developed to search apps across different platforms along with ability to sort apps by categories like paid or free or all. You can get detailed information about the app and you can directly click the link to reach app store.

Quixey, Search Engine For Apps Across Different Platforms

At the home page you have option to search specific platform like mobile, browser, desktop or web-based apps. Users can look in sample searches to get an idea, how does the app works. You can select all to search the apps from all platforms.

quixey1

You can narrow down the search in each group by selecting the specific mobile platform, desktop platform, browser or web app category. Searching for apps is as easy as using Google search. Just search using the app name or type something like ” i want to play racing game”, it will show you appropriate search results.

search1

You can sort apps based on free, paid or all versions of app. Quixey will show app results with icons and ratings and platform that the app supports at the bottom with app developer.

search2

You can click any of the listed app to get a quick preview of the app with pictures and information. You can directly visit the app store by clicking the link for more information and user ratings.

search3

You can get more information right in your search results from Quixey, look at the pictures, visit the app store, sort the app by different platform or even share it with your friends on Twitter and Facebook .

Try Quixey today from here.

SEE ALSO:

Using Photo Sphere Feature of Android 4.2 Jelly Bean Using Photosphere Apps

Android Apps to Keep Track of your Running and Fitness

The post Quixey, Search Engine For Apps Across Different Platforms appeared first on Beebom

Best Windows Phone Apps In 2013 – Part 1

$
0
0

Windows phone apps

The Windows Phone platform is slowly but steadily growing, and while it might not be as big yet to contend the likes of Android, it is getting there. There have been a lot of new additions to the Windows Store this year, and most of them make good use of the great design ethos of the Windows Phone platform.

Here are some of the best Windows Phone apps out this year:

Nokia Pro Cam

This is among the best ever app released for Windows Phone 8 devices but is exclusive to Nokia Lumia 2012 and 2013 devices like the Lumia 1020. The Lumia 1020 is the best Windows device on the market as of now, and it comes pre-loaded with Nokia Pro Cam application which lets you preview the final image even before its clicked. It has a lot of options for pro users such as ISO, Exposure, Focus, Shutter Speed and Aperture. The Nokia Lumia 1020 price In India should be around Rs. 35,000 and most consumers cannot wait for it to become available in the country. While the Nokia Pro Cam app will be available for other devices shortly.

Netflix

Given that Netflix is the most popular subscription service for movies and TV shows, it’s not surprising that the Netflix app is one of the best for Windows Phone. The app recently received an update that fixes most of the existing bugs, so now it’s even better. With this app you can choose what to watch from thousands of selections. You can also rate TV shows and movies to receive relevant Netflix recommendations.

SEE ALSO : Top Social Apps for Windows 8

Skype

The Skype app has also been around forever, however, like Netflix, it also recently received an update to enhance video messaging. Skype allows you to make calls for free, given that you have a data plan or Wi-Fi. You can also IM, send files, share screens, and send video messages to friends who are offline.

Nook

The Nook app is great because it lets you select from over 3 million Nook eBooks, 1 million of which are free, and read the eBook s on your Windows Phone device. You can alter font, font size, and line spacing. One nice feature about this app is that if you are using it from multiple devices, the page that you leave off at is the page that you begin at again.

Kindle

Kindle also lets you have access to lots of eBooks, over 1 million. You can alter the background color of the book, number of text columns displayed, and font size. Kindle lets you pin your books to your Windows Start screen for easy access. Furthermore, Kindle also is compatible across devices. The page you end at on one device is the page you start at on another.

Bing Translator

Bing Translator is a really powerful translation app that can translate text and images with text. You can translate images with text by simply taking a picture with your camera. The translation is near instantaneous as long as the text in the image is printed and clear. Bing Translator also offers text to speech, which allows users to hear translations in a native speaker’s voice.

Adobe Photoshop Express

It’s convenient to be able to fix photos on your phone, rather than uploading them to your computer before sharing. This app allows you to do that and it’s easy to use. You can add filters, adjust the color, use several auto-fix features, or other basic features, like crop, rotate, and flip. There are add-on packs that you can get to get more functionality, such as the Adobe Noise Reduction Pack.

Bejeweled LIVE

If you’re looking for a fun, addictive Windows Phone game, look no further. This is a classic game where the objective is to match 3 gems. This fast-paced game has three different modes: Classic, Diamond, and a Butterfly mode, where the objective is to save butterflies from a spider. This is a game that would be fun for the whole family.

SEE ALSO : List of Windows 8 Keyboard Shortcuts

Hulu Plus

Hulu Plus is another great option for users looking to view TV shows and movies from their Windows Phone device. If you have a favorite show, you can pin it to your Windows Start screen so that you can access it easily.

This year brought about many solid, captivating apps for Windows Phone devices. Windows app development is only going to keep increasing as long as powerful Windows Phone devices keep coming out.

The post Best Windows Phone Apps In 2013 – Part 1 appeared first on Beebom

How to Shutdown or Restart Windows 10 PC with Voice Using Cortana

$
0
0

Windows 10 brought a number of cool new features but the prized feature has to be Cortana. The virtual assistant with a personality has made a number of tasks a lot easier. While it does let you do certain tasks like setting up a reminder, navigating to a place, getting news, opening an app etc., it does lack a few abilities. For instance, you cannot turn off or restart your PC by simply asking Cortana to do so. While Cortana does not do it natively, you can make her do it. Yes, we like dominating! So, here’s how you can shut down or restart Windows 10 with voice using Cortana:

1. Go to Run using Win + R and enter command “%appdata%” and press “Ok”. This should open up the “Roaming” folder inside “App Data” folder.

Windows 10 Run App Data

2. Then, go to Microsoft->Windows->Start Menu->Programs folder. Here, right click on an empty space and create a new shortcut by going to New->Shortcut.

Note: You can also directly go to the folder by going to This PC->C:->Users->User name->App Data->Roaming->Microsoft->Windows->Start Menu->Programs. The “App Data” is a hidden folder, so make sure to go to View->Options->Folder & Search options and tick “Show hidden files, folders and drives”. 

Windows 10 new shortcut

3. Enter the location of the shortcut as “shutdown.exe -s -t 15” and click “Next”. Enter the name of the shortcut as “Shut Down” and click “Finish”. For Restart, create another shortcut with the location “restart.exe -r -t 15” and name it “Restart“.

Windows 10 shutdown shortcut

Windows 10 Shut Down shortcut

Note: You can even set the location as “shutdown.exe -s” or “restart.exe -r”, as the “-t 15” is the time delay before your computer shuts down or restarts with 15 being the number of seconds. Also, make sure to name the shutdown shortcut as “Shut Down” because only then Cortana will recognize it. 

Windows 10 Restart and Shutdown Shortcuts

4. Once done, hit the mic button in Cortana or use the “Hey Cortana” hotword and say “Open Shutdown” or “Open Restart”. Then, you should get a prompt saying that your computer will shutdown/restart in 15 seconds or whatever time you have set.

Shutdown Windows 10 Voice Cortana

Windows 10 Shutting Down

SEE ALSO: 18 Cool Cortana Tips and Tricks

Now Restart or Shutdown your Windows 10 PC with Cortana

You can use the same method to enable a log off command in Cortana, as all you need to do is create a shortcut with location “logoff.exe -l”. Well, this is pretty simple, right? So, try this on your Windows 10 PC and shutdown or restart your PC with ease using Cortana. Do let us know if you face any issues with this method. Sound off in the comments section below.

The post How to Shutdown or Restart Windows 10 PC with Voice Using Cortana appeared first on Beebom


11 Best Free Tools to Download and Install Drivers in Windows

$
0
0

Driver Fixers are smart utilities that fixes any driver problems in your system. These apps download and install missing or outdated drivers on your system, thus improving its stability and performance. In this post, we’re going to share with you the best 11 free driver fixers to download and install drivers in Windows 10, 8.1, 8, Vista, 7 or XP.

These software helps you fix driver problems on the fly without the manual chore of finding or identifying the missing or outdated drivers in your system, then finding them over the Internet and downloading and installing them one by one. These tools work almost automatic and helps you save lots of time & efforts, hence improving your work productivity.

1. DriverPack Solution

DriverPack Solution, one of the earliest driver fixers, automatically detects the outdated drivers in your system and updates them in one go. It’s a time-saving program that relieves you from the hassle of identifying the drivers manually. Moreover, the program offers a simple interface without any distractive options and supports Windows XP & above.

Pro(s): DriverPack Solution offers some of the best features possible:

  • Finds required drivers in your system automatically
  • Lets you download and install drivers in one-click
  • Allows bulk downloading unlike other driver fixers
  • Offers two downloads – online & offline packs

Con(s): DriverPack Solution isn’t perfect, of course, and lacks these:

  • Doesn’t allow free users to install drivers manually
  • Installs unnecessary software without asking, sometimes

DriverPack Solution

2. DriverMax

DriverMax is a driver-fixing solution that updates and installs all outdated drivers on the fly. The software scans your PC and detects all the missing, corrupted or outdated drivers. DriverMax even exports all the older drivers stored in your system to avoid them mixing or clashing with the new ones. The tool supports and works on Windows XP.. up to Windows 10.

Pro(s): DriverMax brings some of the interesting features:

  • Auto-checks for driver updates
  • Updates multiple drivers with a single click
  • Performs a system backup before installing drivers
  • Allows making system restores for fixing driver install issues

Con(s): DriverMax has also some disadvantages for free users like:

  • Limits free driver downloads
  • Allows unsigned (and insecure) driver updates
  • Downloads drivers after a short period, not instantly

DriverMax

3. IObit Driver Booster

Driver Booster is a fast and efficient driver fixer tool, which keeps your system drivers up-to-date and enhances the overall system performance. Driver Booster supports more than 200K drivers and removes any corrupted or worthless drivers (that cause problems otherwise). It claims to feature one of the largest driver database for Windows XP & above.

Pro(s): Driver Booster packs-in few interesting features:

  • Creates restore points before installing drivers
  • Allows scheduled and automatic driver downloads
  • Supports uninstall & rollback to rectify faulty installations

Con(s): Driver Booster has also got some problems:

  • Doesn’t offer free download of some drivers
  • Doesn’t support bulk/auto downloading for some drivers

IObit Driver Booster

4. Free Driver Scout

Free Driver Scout is a driver fixer and installer that says to have the largest number of drivers (though it’s not true), and updates your system drivers for free like DriverPack or DriverMax. The tool automatically scans for the outdated and non-working drivers and lets you install them easily and smoothly. Free Driver Scout also lets you backup and restore drivers per your requirements, and it supports Windows XP and later versions.

Pro(s): Free Driver Scout offers some necessary features:

  • Supports bulk downloads
  • Install the updates automatically
  • Offers instant driver downloads unlike DriverMax
  • Supports automatic and manual scans unlike DriverPack

Con(s): Free Driver Scout also shortfalls on certain points:

  • Couldn’t find some outdated drivers
  • Attempts to install few irrelevant programs at installation

Free Driver Scout

5. Driver Easy

Driver Easy lets you install all the missing drivers and even allows finding them manually on your Windows PC. The program does an in-depth scan to find which drivers are corrupted or outdated and lets you install them. Driver Easy claims to have 8 M+ drivers in its database, which means it’s going to catch and update every possible driver on the system. Also, the app supports all versions up to Windows 10, just like others.

Pro(s): Driver Easy competes with competitors by features like:

  • Allows automatic and even scheduled scanning
  • Offers backing up drivers before updating or installing them
  • Supports system restore in case something goes wrong during installation

Con(s): Driver Easy also brings few disappointments like:

  • Downloads outdated drivers, sometimes
  • Downloads slowly than other free programs listed here

Driver Easy

6. Driver Talent

Driver Talent is a driver fixing solution that finds the compatible missing drivers for your PC and installs them easily. Driver Talent also updates your system drivers on the top of the outdated or corrupted drivers, making the system run smoothly. Unlike few of its competitors, it also displays the driver size, release date and version number to ensure you download the correct drivers. Also, it supports all releases starting from Windows XP and Server 2003.

Pro(s): Driver Talent has some exciting advantages like:

  • Offers uninstalling drivers you don’t require
  • Downloads and installs drivers at fast rates
  • Let you backup the updated and installed drivers
  • Allows restoring drivers from the backup after failures

Con(s): Driver Talent also packs few disadvantages like:

  • Detects less drivers as compared to other solutions

Driver Talent

7. SlimDrivers

SlimDrivers detects the outdated drivers on your system and also identifies the proper executables for your PC and installs them on the fly. The software finds the latest drivers for your system using its real-time cloud scanning technology for best results. SlimDrivers works only on Windows XP and all later releases unlike Driver Talent.

Pro(s): SlimDrivers offers various features like:

  • Lets you backup and restore the drivers
  • Lets you uninstall outdated drivers from the system

Con(s): SlimDrivers also lacks few things like:

  • Doesn’t allow bulk downloads with a single click in free version
  • Installs SlimCleaner, a system cleaning tool, without permission

SlimDrivers

8. WinZip Driver Updater

WinZip Driver Updater, a driver-fixing solution having one of the extensive driver databases, scans your PC and finds & installs the outdated drivers. The drivers can be installed with ease and you can also update them manually. Driver Updater offers the genuine drivers from manufacturers, and it runs on Windows XP and above.

Pro(s): Driver Updater brings some nice features from the team behind WinZip:

  • Allows skipping driver updates
  • Lets you schedule/automate driver scans
  • Ensures good performance of the updated drivers
  • Automatically scans and installs quickly the outdated drivers

Con(s): Driver Updater has some insufficiencies too like:

  • Leaves few outdated drivers during scanning in free version
  • Few updates indicate inaccurate information about installed drivers

WinZip Driver Updater

9. Snappy Driver Installer

Snappy Driver Installer finds all missing and outdated drivers that prevents you from configuring your hardware and installs them all to get you smooth-performing system. This is a portable tool which can be carried anywhere using flash drives, and it works pretty great on all releases starting from Windows XP and Server 2003 just like Driver Talent.

Pro(s): Snappy Driver Installer has lots of advantages like:

  • Free & open source unlike various others
  • Offers online as well as offline versions of its driver packs
  • Automatically creates a system restore point for avoiding failures

Con(s): Snappy Driver Installer has few disadvantages too like:

  • Its interface may confuse some people
  • Doesn’t provide any option to set scanning schedules

Snappy Driver Installer

10. Driver Fighter

Driver Fighter takes care of your system hardware and finds all the latest and compatible drivers for you. It prevents possible hardware conflicts from damaging your system. This driver updater detects the best drivers flawlessly and keeps your system up-to-date with support for Windows 10, 8.1, 8, 7 and XP.

Pro(s): Driver Fighter is best at some things like:

  • Its interface is simple and easy to use
  • Scans and installs drivers at high speed

Con(s): Driver Fighter also lacks at few things like:

  • Displays wrong info about drivers, sometimes
  • Displays pop-ups and installs unnecessary programs, sometimes

Driver Fighter

11. Device Doctor

Device Doctor is a free program that scans your system for the outdated drivers and updates them easily. The software claims to have a driver database with over 13 M+ drivers for various devices. It’s a very simple tool that helps you correct majority of hardware problems and supports all Windows versions starting from Windows XP.

Pro(s): Device Doctor has these positive features to share:

  • Its interface is simple and easy to use
  • Supports drivers for all the major computer hardware

Con(s): Device Doctor also comes with possible problems like:

  • Doesn’t take backups before installing drivers
  • Doesn’t support bulk downloading of drivers in the free version

Device Doctor

SEE ALSO: 10 Common Problems in Windows 10 (With Solutions)

That’s all folks about the best tools to download and install drivers for Windows without paying any bucks. Which is your favorite driver fixer or installer? Please tell using comments.

The post 11 Best Free Tools to Download and Install Drivers in Windows appeared first on Beebom

8 Search Tips and Tricks for Windows 10 (Essential + Advanced)

$
0
0

Windows 10 comes with all new Cortana and various other features to help you do things. It’s necessary, however, to know the tools and their tricks to make the most out of them. Today, in this post, we’re going to show some of the essential (and advanced) search tips & tricks for Windows 10 to help you make searches easily – for your data on your #Win10 PC.

Search using Cortana

Cortana is Microsoft’s answer to Apple’s Siri for Windows 10 and your personal guide to enhanced searches. Cortana helps you find things with natural and voice search – allowing you find things locally as well as on the web. It’s one of the distinctive features of Windows 10 that brings much more functionality than mere making searches.

To use Cortana, please use these steps:

  1. Click the search button in the Taskbar
  2. Type in or speak your search query to see results
  3. Select any of the filters (various icons in the top bar) to check selective results, for example, Settings filter lets you see settings/configuration items only and Web filter shows you results from the web rather than local findings

Search using Cortana

Search from Search Box

Search box is the easiest method to search some file or folder right from the File Explorer. Located at the top-right of the File Explorer, Search box looks up for data in the current opened directory – be it the computer, individual drive or some particular folder.

With thousands of files on your PC, you might forget their locations and hence, this search box really helps when you’re in dear need. For instance, if you forgot the location of a file named ‘Market Report.docx’, then simply type ‘market’ or ‘report’ in the search box and hit Enter key, and Windows 10 will instantly display all the files with same/similar names.

Search from Search Box

Use Wildcards

Wildcards are used as fillers to make name guesses for searching information when you aren’t sure of the exact keyword to look for. It helps you retrieve the results by substituting the wildcard with possible guesses/combinations of letters and searching those names.

Here’s details about each wildcard character:

  • * (asterisk): It’s replaced by none, one or more characters. If you type ‘eas*’, it tells to search all names starting from ‘eas’ and the names can/can’t end with more characters, and hence, the results will include the words ‘eas’, ‘easy’, ‘easier’, etc.
  • ? (question mark): It’s replaced by just one character (and not none too). If you type ‘ad?pt’, then it can display the names like ‘adapt’, ‘adopt’, ‘adept’, etc.
  • # (pound or hashtag): It’s replaced by a set of numeric digits. If you type ‘2#4’, then it will display ‘204’, ‘214’, and any name including any numbers between 2 & 4.

Use Wildcards

Use File Properties

File Properties means the properties or metadata or details about the file(s), for example, its creation date, file type, author (or creator), etc. These can be used to search for files and folders too – it’s like having more information than just filenames to search efficiently.

Some of the examples of file properties are described below:

  • name (File Name): Include part of or full name in your search query to find using file names. For example, for a file named ‘May Worksheet’, type ‘May’ or ‘work’ and more. One can also use key/value pair like ‘name: May’, ‘name: work’, etc.
  • kind (File Kind): Include the kind of file you are looking for, like ‘document’, ‘audio’, etc.One can also use key/value pair like ‘kind: document’, ‘kind: other’, etc.
  • type (File Type/Extension): Include the file format name like TXT, DOCX, JPG, BMP, etc. One can also use key/value pair such as ‘type: EXE’, ‘type: TXT’, etc.
  • tags (Tags): Include any tag or keyword which is used to describe that file(s). One can also use key/value pair such as ‘tags: project’, ‘tags: school’, etc.
  • author (Author): Include the author’s name to search for files using their creator(s). One can also use key/value paid, for example, ‘author: john’, ‘author: lina’, etc.

Use File Properties

Use Boolean Filters

Boolean filters allows making advance searches by combining search terms or phrases. There are various boolean operators as described below. Make sure you type the filters in capital letters while performing such searches.

Example search queries with explanations are given below:

  • AND: Include ‘AND’ to search for both terms. For example, ‘word AND pad’ searches for files having both these words and results ‘wordpad.exe’, ‘word notepad.txt’, etc.
  • OR: Include ‘OR’ to search for any of the terms. For instance, ‘word OR pad’ searches for files having any of these words and results ‘word.exe’, ‘ notepad.txt’, etc.
  • NOT: Include ‘NOT’ to not search that term. For example, ‘NOT pad’ searches for files not having this word and results ‘word.exe’, ‘word note.txt’, etc.
  • Quotes: Include your query under double quotes “” to search for exact phrases or filenames, like ‘“India Gate”’ (including double quotes and excluding single quotes) shows files with exact name ‘India Gate’.
  • Parentheses: Include your query under parentheses () to search for all of those words (but even if those are present in any order). For example, ‘(cricket football hockey)’ search gives ‘cricket hockey football.txt’, ‘hockey football cricket.docx’, etc.
  • > (greater than): Include ‘>’ to search for greater/more than or later than some value such as ‘date: > 01/01/2016’ searches for documents created after 1st January 2016.
  • < (lesser than): Include ‘<’ to search for less than or earlier than some value like ‘size: < 5 MB’ searches for files/documents taking less than 5 MB of storage.

Use Boolean Filters

Use File List Headings

File list headings are visible in File Explorer’s Details view – even on search results screen. Using these headings and few tricks, one can find files or information more efficiently than ever. For example, if you searched for ‘travel*’ and you’re seeing a list of your travel invoices of which you want the latest one, then you can sort the list using date created or modified in descending order – you’ll have the required file at the top. Quite fast, right?

To view file list headings, enable Details view by performing these steps:

  1. On the search results screen (after you’ve made the search), click on ‘View’ ribbon and click ‘Details’ button

Use File List Headings

To sort the results, kindly do the following steps:

  1. Click on ‘View’ ribbon and click on ‘Sort by’ option
  2. Choose the field/column using which sorting should be done and you can also choose the sorting order (ascending or descending)

Use File List Headings

To group the results, kindly follow these steps:

  1. Click on ‘View’ ribbon and click on ‘Group by’ option
  2. Choose the field/column using which grouping should be done

Use File List Headings

To filter the results, please run these steps:

  1. Hover the column which you want to filter, click on the down-arrow icon showing up at the right-most of that column
  2. Choose all the values you wish to filter by

Use File List Headings

Use Advanced Search Tools

Advanced Search tools is a set of search options to fulfil all your search requirements – availing all the possible advance options on a single screen. It’s used for searching files and folders with less or more information per availability like file location, tags, size, date and property and many more. Using this, you don’t need to remember search operators and all. It also allows to check recent searches and find using file properties and more.

To access the advanced search tool, please follow this process:

  1. Search using the Search Box in File Explorer
  2. Click/open the Search (Search Tools) ribbon
  3. Set the various available options/preferences
  4. Search results will change as you choose options

Use Advanced Search Tools

Save your Search Query

Windows 10, along with other miraculous features, also lets one save searches or search queries to find same things again – in fast track mode. There may come scenarios wherein you have to form cumbersome queries for doing some advance or deep searches to find the exact thing required. In such cases, a search save option comes really handy.

To save your search query, please do these steps:

  1. Search (even if dummy) using the Search Box in File Explorer
  2. Click/open the Search (Search Tools) ribbon
  3. Form your query by setting the various available options/preferences
  4. After finalizing and testing your search query, click on ‘Save search’ option
  5. Type in a name and location to save and click Save button

Save your Search Query

SEE ALSO: How to Lock Specific Apps in Windows 10

That’s all folks about all the search tips and tricks for Windows 10. Do you know any more? Do let us know through comments section.

The post 8 Search Tips and Tricks for Windows 10 (Essential + Advanced) appeared first on Beebom

No Free Windows 10 Updates After July 29: Everything You Need To Know

$
0
0

Microsoft introduced Windows 10 to us in May 2015 and while some people loved it, some did not. However, what really got heads turning was the fact that Microsoft had made the Windows 10 upgrade available for free to almost all Windows 7 and 8.1 users. Making the Windows 10 upgrade free was an important move for the Redmond giant, considering the extended support commitment for Windows 7 ends on 14 January 2020 and a few years down the line, most devices running on Windows 7 will be seemingly outdated with no support, and that is just another mess Microsoft would choose to avoid. Sadly, the “free” tag hasn’t lured everyone and as of now, 300 million devices are running Windows 10, which is a good number but nowhere close to the billion target of Microsoft. However, the free upgrade offer is going to end on July 29.

Now that the free updates are about to end, there are a lot of unanswered questions. Some are wondering if they will have to pay for future updates to Windows 10, even though they availed the free upgrade option initially. What does it mean for existing Windows 10 users and how much will it cost to others who want to upgrade to Windows 10 after 29th July 2016? Will the user have to pay any money if he runs into trouble and has to reinstall Windows 10 on the same device? We are here to answer all your questions and to tell you everything you need to know:

Windows-10-July-29

What it means for new users?

After July 29, Windows 10 license will cost $119 to users who did not avail the free upgrade and are still running Windows 8.1 or Windows 7 on their PCs. Though it is pretty much certain that the free upgrade option will not be extended, there is still speculation that Microsoft may bring up new offers for limited periods to get more users to upgrade. Microsoft has also announced that sales of Windows 7 and 8.1 PCs from all the OEMs will stop on 31 October 2016.

Windows 10 free upgrade

What it means for existing users that have availed the offer?

For those of you who did avail the free Windows 10 upgrade offer, you’re on the better side of things. The offer on Microsoft’s site clearly stated that once you upgrade, you have Windows 10 for free on that device. This means that you won’t have to pay for it even if you run into some trouble and have to reinstall Windows 10 on that same device in the future.

Anyone who has taken up Microsoft’s offer for a free Windows 10 upgrade has a “digital entitlement” tied to that hardware. The point of digital entitlement is to associate the Windows 10 license with your specific hardware, making a product key unnecessary. When you upgrade to Windows 10, the Windows activation server generates a Windows 10 license certificate known as “digital entitlement” with your installation ID.

This makes it safe for you to completely wipe your hard disk and install a fresh copy of Windows 10 when you want to, on the same device. The activation of Windows 10 is made with respect to the hardware on your device, and in the future, when you try to re-install Windows 10 on the device, Microsoft’s Software Licensing Manager Utility will check for the ID to ensure that the underlying activation on the device is genuine.

A Simple way to get the Windows update after July 29

If you are not happy with Windows 10 and want to roll back to the older version of Windows you were using, you can do that easily. You don’t have to worry about your Windows 10 activation being rendered void because of the roll back, since as we mentioned above, your PC’s hardware is tied to the Windows 10 upgrade. To roll back to an older version of Windows, go to  Settings > Update & security > Recovery, and you will find the rollback options there.

windows recovery

What is important here is that even if you don’t intend to use Windows 10, you can activate it before 29th July 2016 for free and then rollback to your older version within 31 days of upgrade. This will ensure that your device is entitled to activate Windows 10 anytime in the future, if need be, so you don’t have to pay for it.

SEE ALSO: Windows 10 Home vs Pro: Which One You Should Upgrade to?

Conclusion

It’s pretty clear that Microsoft has announced the deadline of 29 July to get people to upgrade to Windows 10. The company has taken a lot of stick for the way they’ve prompted people to update their PCs to Windows 10. Many felt that the update was being forced rather than provided as an option and that’s expected, considering Windows 10 is the last Windows iteration and the company plans to update the platform as a service from now on. We think upgrading to Windows 10 shouldn’t be a bad decision, considering the new Anniversary update arrives this August and since you can roll back within 31 days, you should give it a shot.

Well, that’s all from our front, if you have any more questions regarding the Windows 10 free upgrade deadline, do let us know through the comments section below.

The post No Free Windows 10 Updates After July 29: Everything You Need To Know appeared first on Beebom

How to Auto Shutdown Windows 10 PC

$
0
0

Time flies by when you are working on your PC or even if you are just playing a game that has you really engrossed, which can sometimes ruin your schedule. If you really want to discipline yourself, it’s important that you schedule your working hours or gaming hours. And you can do that by setting up your Windows 10 PC to automatically shutdown after a period of time or at a certain point of time daily. There are a couple of ways to schedule shutdown in a Windows 10 PC. Well, without further ado, here’s how you can auto shutdown Windows 10 PC:

Method 1: Schedule auto shutdown with Task Scheduler

You can use Windows’ built-in Task Scheduler to create a task, which will automatically shutdown your Windows 10 PC with ease. Here are the steps you need to follow:

1. Just hit Windows 10’s Cortana search bar and search for “Task Scheduler” and you should find the relevant result. Click on it.

Search Task Scheduler

2. The Task Scheduler window should open up. Here, click on “Create Basic Task…“.

Task Scheduler on Windows 10

3. You can then set a name for the task and add a description. Once done, click “Next”.

Auto Shutdown Task

4. Then, you can set up whether you want the task to be active daily, weekly, monthly or you just want the task for this one time. You can choose to trigger the task when you log in to the computer, when the computer starts or when a specific event is logged in.

Auto shutdown task time trigger

5. Once done, you can choose the exact time at which you want the task to start. You can also check the option to “Synchronize across different time zones”, if you travel to different countries a lot.

Auto shutdown task start time

6. After you have selected the time of the task, you will have to choose the action you want the task to take. Choose “Start a program“. You can even choose “Display a message”, if you just want a display reminder to wake you up.

Auto shutdown task action

7. Then, hit the “Browse” button in the next page and go to the C:\Windows\System32 folder and select “Shutdown.exe“. In the add arguments section, type “-s -t 1800“, where 1800 is the number of seconds that the computer will take to shutdown after the prompt. Once done, click on “Next”.

Auto shutdown minutes set

8. You will then get an overview of the task. Click “Finish” to complete the task creation.

Auto shutdown task overview

Once this task is created, you will get a notification at the time you’ve scheduled the task for, suggesting that your Windows 10 PC will shutdown after the specified time. We will recommend you to set the number of seconds in the 7th step, so that you have some time to save your ongoing tasks before your Windows 10 PC automatically shuts down.

Once the task is created, you can go to Task Scheduler->Task Scheduler Library and right-click on the task you’ve created and select “Properties“. Here, you can play around with various security options, conditions, history and more. You can also choose to run, end, delete or disable the task from the right-click menu.

Auto shutdown task check properties

Method 2: Auto Shutdown via Run or Command Prompt

If you don’t want to schedule auto shutdown for daily and you want it only for this one time use, you can use Run or Command Prompt or even Powershell to set a specific time after which the Windows 10 PC will shutdown. Here’s how to do it:

  • Run

Open Run on Windows 10 with the key combo Win+R. In Run, type “shutdown -s -t 1800“, with 1800 (30 minutes) obviously being the number of seconds after which the PC will shut down. Click on “Ok”, after which you will get a notification saying “Windows will shut down in 30 minutes”.

Run auto shutdown windows 10 PC

  • Command Prompt

You can just open up Command Prompt or Powershell and run the same command “shutdown -s -t 1800” to auto shutdown Windows 10 PC.

Auto shutdown Windows 10 command prompt

Note: You can replace “-s” with “-r” in all the shutdown commands to auto restart your Windows 10 PC. 

SEE ALSO: How to Shutdown or Restart Windows 10 PC with Voice Using Cortana

Ready to automatically shutdown your Windows 10 PC at a scheduled time?

Auto shutdown Windows 10 PC notification

If you are looking to schedule shutdown your Windows 10 PC just for the time being, you can use the second method, as it’s pretty simple. However, if you are looking for an auto shutdown solution for a long term, you should use the first method, which is elaborate and offers a plethora of options. So, try both the methods out and choose the one that suits you better. Do let us know if you face any issues. Sound off in the comments section below.

The post How to Auto Shutdown Windows 10 PC appeared first on Beebom

5 Best Winamp Alternatives for Windows

$
0
0

When it comes to music player applications, Winamp is a name that needs absolutely no introduction. A staple of just about every PC back in the days, the legendary software introduced many of us (including, yours truly) to the whole concept of enjoying music on our computers. Fast forward to the present day, and it has been superseded by a number of great music player programs.

But even though the official website of Winamp (now owned by Belgian online radio aggregator Radionomy) states that “there’s more coming soon,” as of now, its stable downloadable version is more than two years old. So, if you rely on Winamp for your music needs, it’s time to start looking at some alternatives.

And this is the article that’s going to help you find the best Winamp alternatives out there. So what’s the wait? Get your music ready, and jump in!

1. MediaMonkey

Looking for not just a music player, but also a powerhouse media organizer application? MediaMonkey is just the Winamp alternative you need. It can easily manage media collections spanning hundreds of thousands of songs, both local and network stored. Advanced functions let you sort & organize music based on genre, artist, and things like that.

mediamonkey

MediaMonkey supports nearly all music formats (e.g. MP3, FLAC, AAC), and thanks to its syncing prowess, it can backup and sync media with numerous Android, iOS and Windows devices. And if you’re still not impressed, it even lets you share media with UPnP and DLNA compatible devices like TVs. Oh, and let’s not forget the various add-ons available for it, which help MediaMonkey speak song title, stream music over the web, and do lots of other cool things.

Platform Availability: Windows 10, 8 and 7 (Desktop); Android (Mobile)

Price: Free version as well as a Paid version costs $24.95

Download

2. Foobar2000

Developed by a former freelance contractor for Nullsoft (the company behind Winamp), Foobar2000 is probably the most flexible and extensive music player out there. Sure, its UI looks pretty dated, but underneath that, it hides tons of features. Foobar2000 has a highly modular design and you can completely customize which modules (e.g. playlist manager) are shown. (For example, the companion screenshot below shows the latest version 1.3.10  displaying the Album art, Track info, Playlist, and Spectrogram modules).

foobar2000

It can rip Audio CDs and convert media in numerous different formats. Foobar2000 can even read media files stored in archives such as ZIP and RAR. Other features include customizable keyboard shortcuts, portable installation, and an extensive SDK that allows features like playback stats, UPnP streaming etc. that can be added to the software.

Platform Availability: Windows 10, 8, 7, Vista, and XP (Desktop); Development for all major mobile platforms planned, via crowdfunding support.

Price: Free

Download

3. MusicBee

As en easy to use music player that also has some media management thrown into the mix, MusicBee makes a really good case for a reliable Winamp alternative. It can play all popular formats, and supports gap-less playback as well. There’s built in tag editor, which lets you easily edit or add ID3 tag information to songs, and the same can be fetched online too.

musicbee

MusicBee’s Auto DJ mode lets you automate music playback, complete with configurable settings like library sources, similar artist track playback etc., which can be saved as custom filters. Oh, and the Music Explorer module can be used to browse the top charting artists, albums etc., thanks to MusicBee’s integration with the Xbox Music service. Also, the plug-in support (including those of Winamp) lets you add extra features (e.g. device syncing) to the software.

Platform Availability: Windows 10, 8, 7, Vista, and XP (Desktop)

Pricing: Free

Download

4. Clementine

Totally free and open-source, Clementine is loaded up with everything you’d want in a music player software, and then some more. It not only lets you effortlessly play (and manage) your local music library, but also listen to Internet radio from diverse sources, such as Spotify and Jamendo. In addition, there’s support for smart and dynamic playlists, and the application can automatically fetch missing tag information from the MusicBrainz database as well.

clementine

You can also search & download podcasts and check lyrics and artist bio. Oh, and did we mention that Clementine can search and play songs stored in cloud storage services such as Dropbox, Google Drive, and OneDrive? There’s just one thing, Clementine has not been updated in the last two years, which is a little bit of a bummer.

Platform Availability: Windows, Mac OS X, Linux (Desktop); Android (Mobile, as Clementine Remote app)

Price: Free

Download

5. AIMP

For those wanting a straightforward music player application that packs a healthy balance of features and simplicity, AIMP is the Winamp alternative to go for. Just load up your music library, and enjoy it with AIMP’s 32-bit audio processing for a great experience. It comes with a number of audio effects, such as Flanger and Voice remover, and can even record Internet radio to standard audio files.

aimp

However, perhaps the most unique feature of AIMP is that it can load the currently playing track (up to 250 MB) into the RAM, thus resulting in a more seamless playback. And that’s not all. AIMP’s feature list includes configurable global hotkeys, automatic shutdown, and support for numerous plug-ins.

Platform Availability: Windows 10, 8, 7, and Vista (Desktop); Android (Mobile)

Price: Free

Download

Worthy Mentions

  • Windows Media Player: If you don’t want to use a third-party software, Windows’ native media player can be a decent Winamp alternative. And while it’s true that Windows Media Player lacks features like advanced codec support for audio formats, it’s more than enough for basic usage.
  • VLC Media Player: There’s hardly any audio (or video) format in existence that VLC Media Player can’t handle. If you don’t care about things like advanced library management, skinning support etc., the best video player will work as a perfect Winamp alternative for your needs.

SEE ALSO: 10 Best Video Players For Windows

Lots of great Winamp alternatives!

Winamp has always been (and still is) one of the most feature laden and popular music player applications. And while it’ll be surely awesome when it comes back, for the time being, the above discussed applications are going to serve you just perfect. Try them all, and sound off your thoughts in the comments below.

The post 5 Best Winamp Alternatives for Windows appeared first on Beebom

Viewing all 203 articles
Browse latest View live